|
 |
|
 |
|
| Author |
Message |
Mr Webber
Community Member

Joined: 13 Apr 2008
Posts: 1824
Location: Terra Australis
|
 Posted: Thu Jul 09, 2009 11:41 am Post subject: Full Medicom conversion. FINAL ADDITIONS Posted: Thu Jul 09, 2009 11:41 am Post subject: Full Medicom conversion. FINAL ADDITIONS |
 |
|
As my eyesight isnt getting any sharper i thought it best to get my last medicom converted using the superb Japanese upgrade kit. About a year ago i came across a step by step tutorial on how to convert the medicom using Phil S`s excellent decals and after finding a suitable medicom, went about converting it using the tutorial, the results of which can be found in here somewhere. Not long after, the site closed down so i thought it might be good to post a tutorial of sorts here for anyone who might be undertaking the same build.
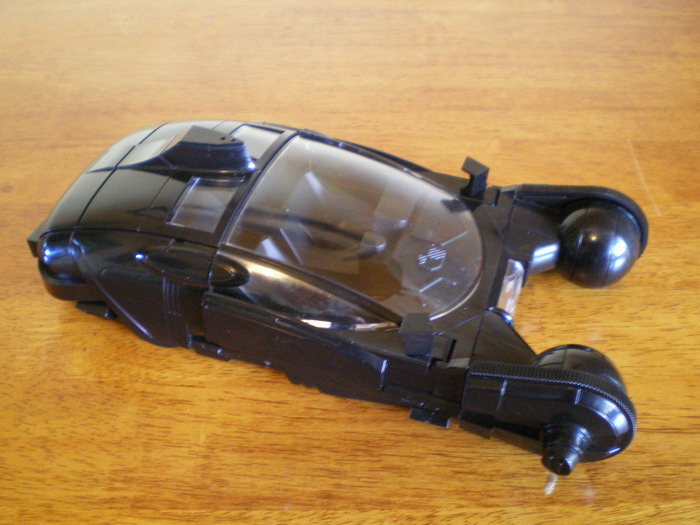 
To begin, remove the 8 screws on the underside of the spinner. The two front exhaust vents will also have to be removed to expose front screws,
they just pull off. After all screws have been removed, simply lift entire top half of spinner in one piece............
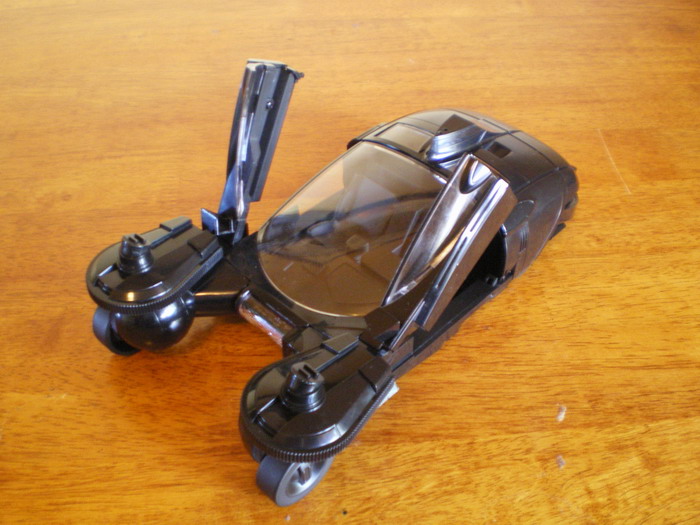
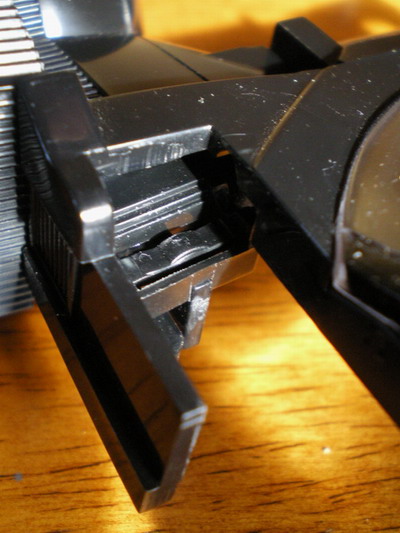
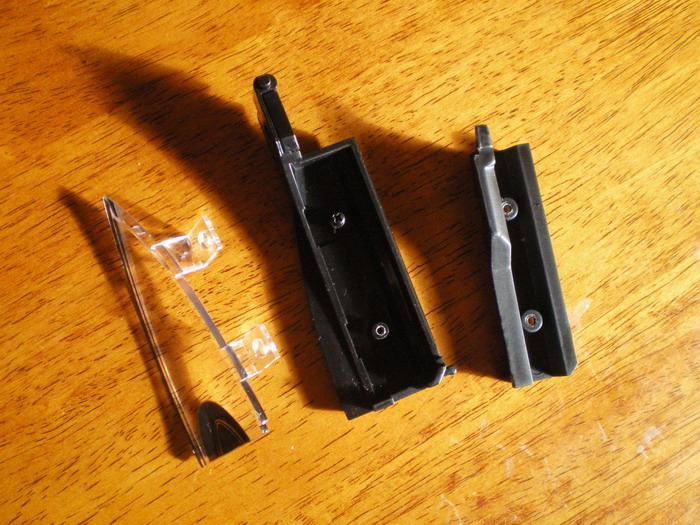
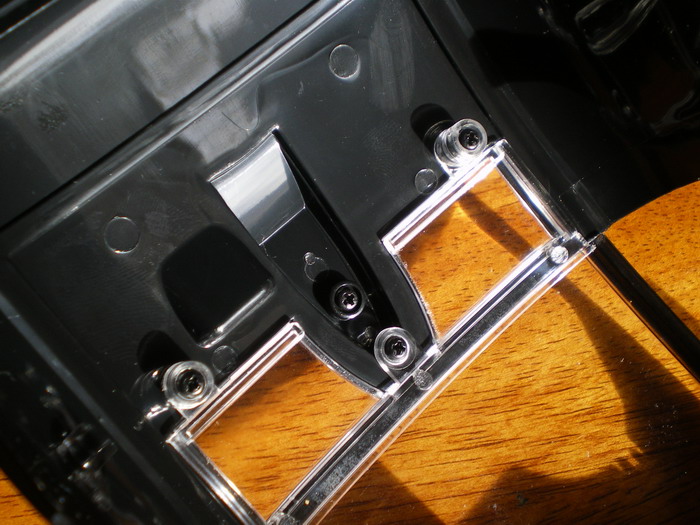
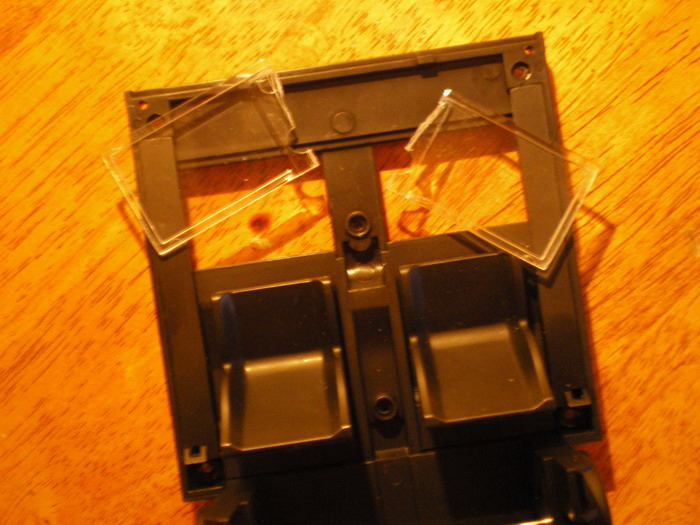
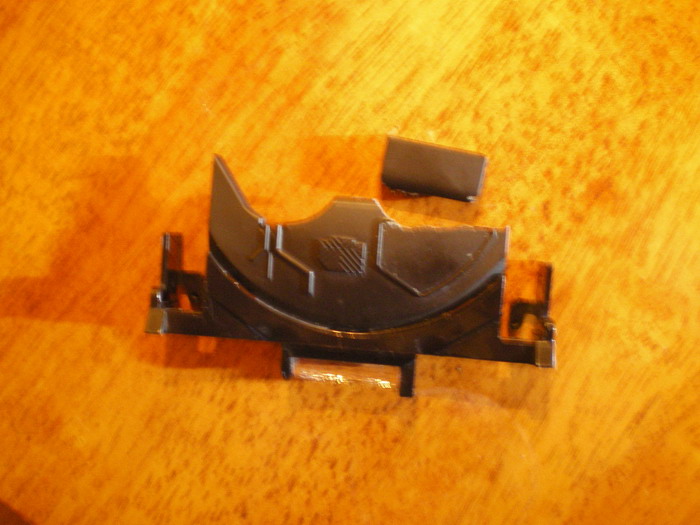
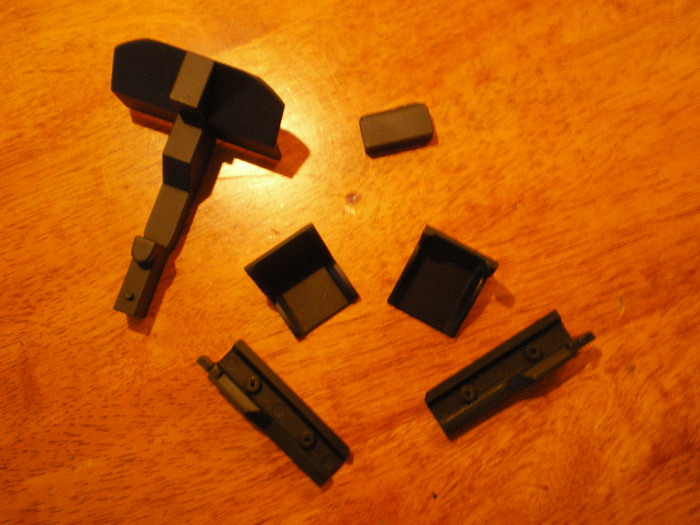
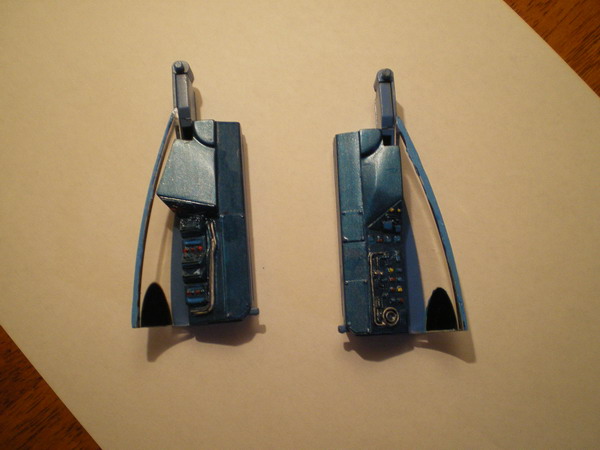
To remove the doors, gently twist each door out of its socket, they are not secured with screws or glue. Once the door comes out, a small clip will follow, the pic below shows the placement of that clip when it is time to re attach the doors. The door then breaks down into three pieces.....
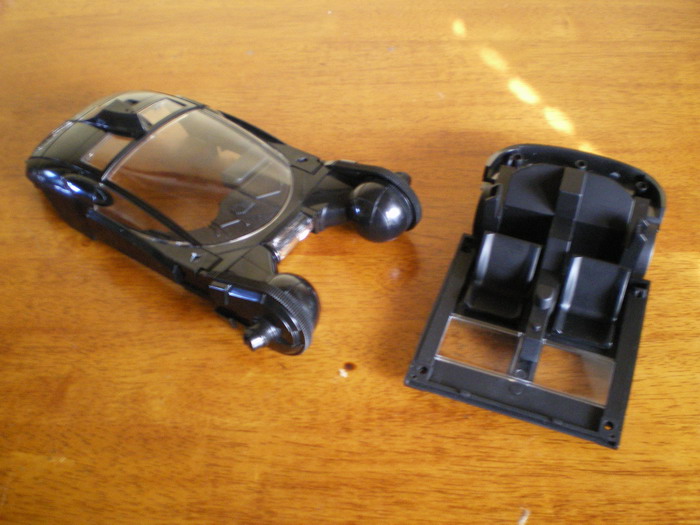
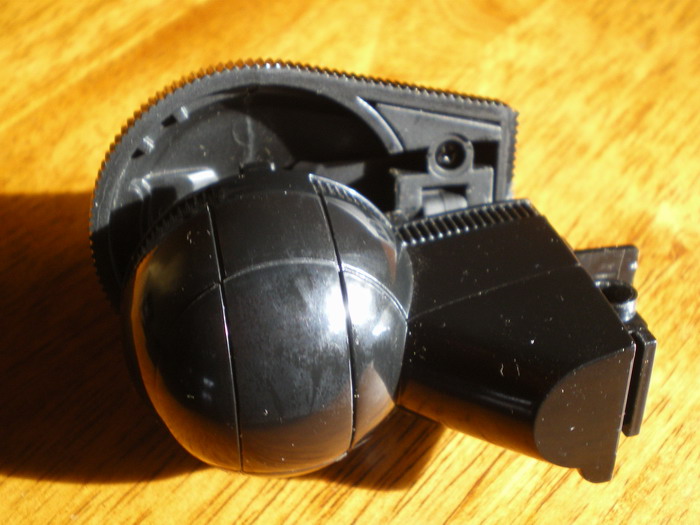
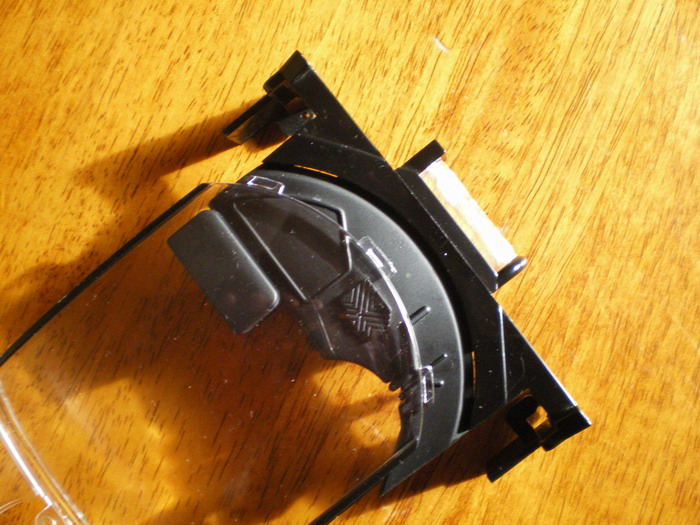
Remove the 2 screw at the front of the spinner, then slide up and out both
front wheel bubbles. Then remove the 2 screws that hold the adjustable front wheel covers.
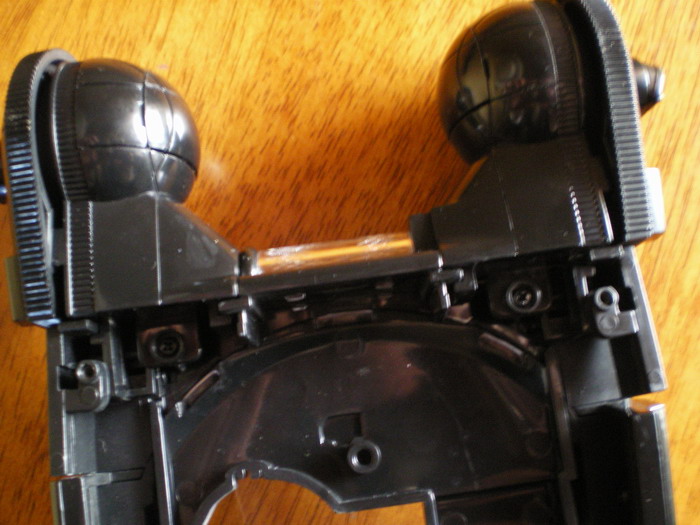 
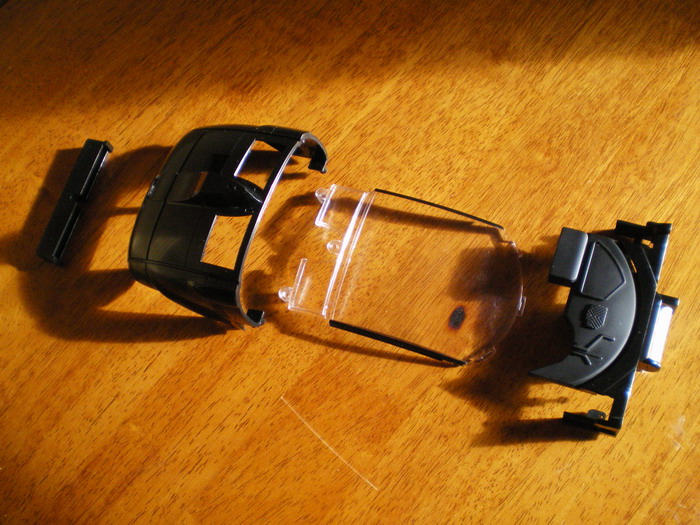
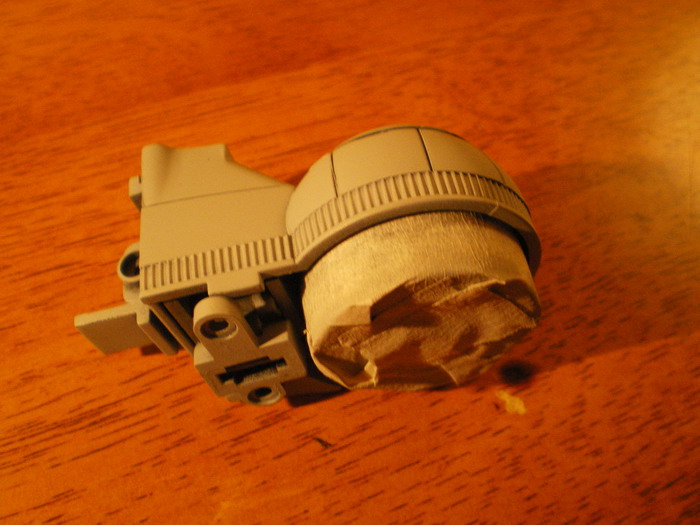
Remove the 3 screws that hold the cockpit cover in place, also remove the screw which secures the top roof piece in place. The cockpit cover
must be removed very gently from the front piece, this also requires patient jiggling of the cover until it frees itself.
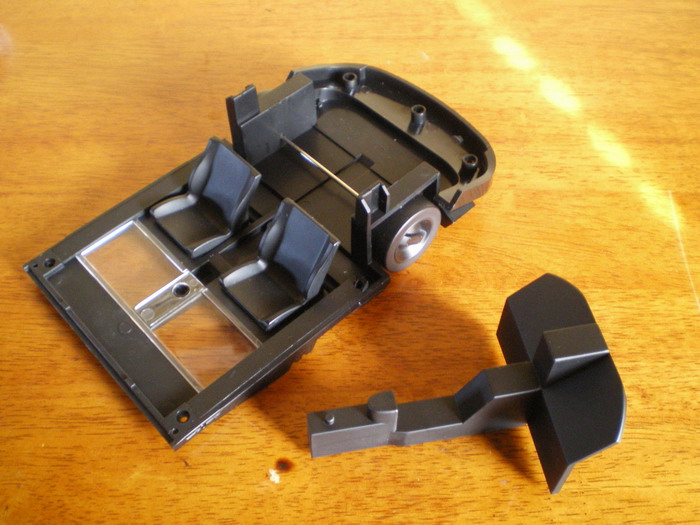
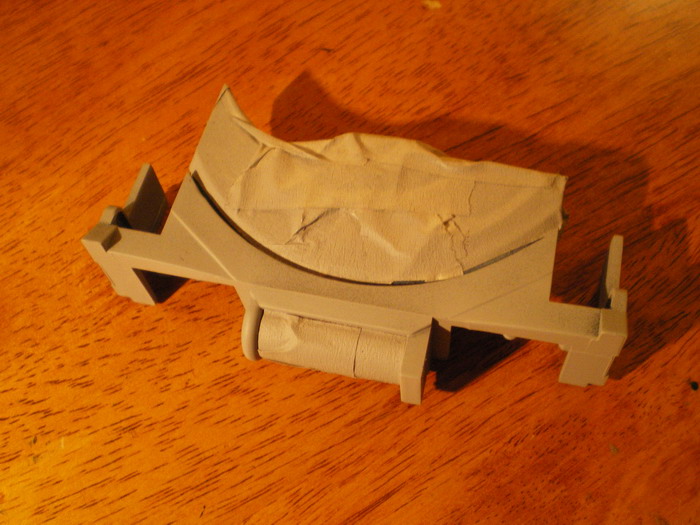
To remove the floor "glass" using a razor of some description, cut along the center of the glass repeatedly until you can place a matchstick underneath it and snap the glass into two pieces.........
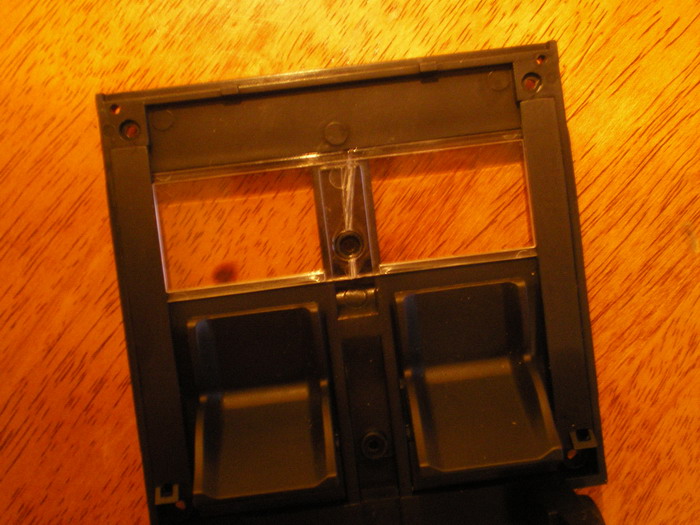 
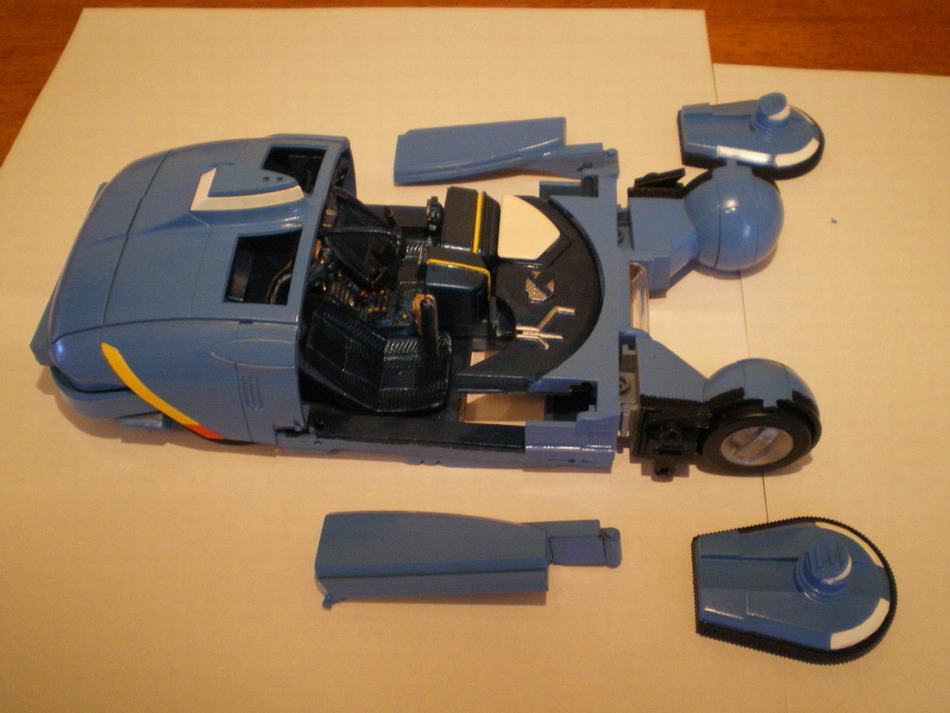
This is the completed breakdown of the spinner and all that is reqiured now is to use masking tape in some areas, pics later, and its ready for painting..........
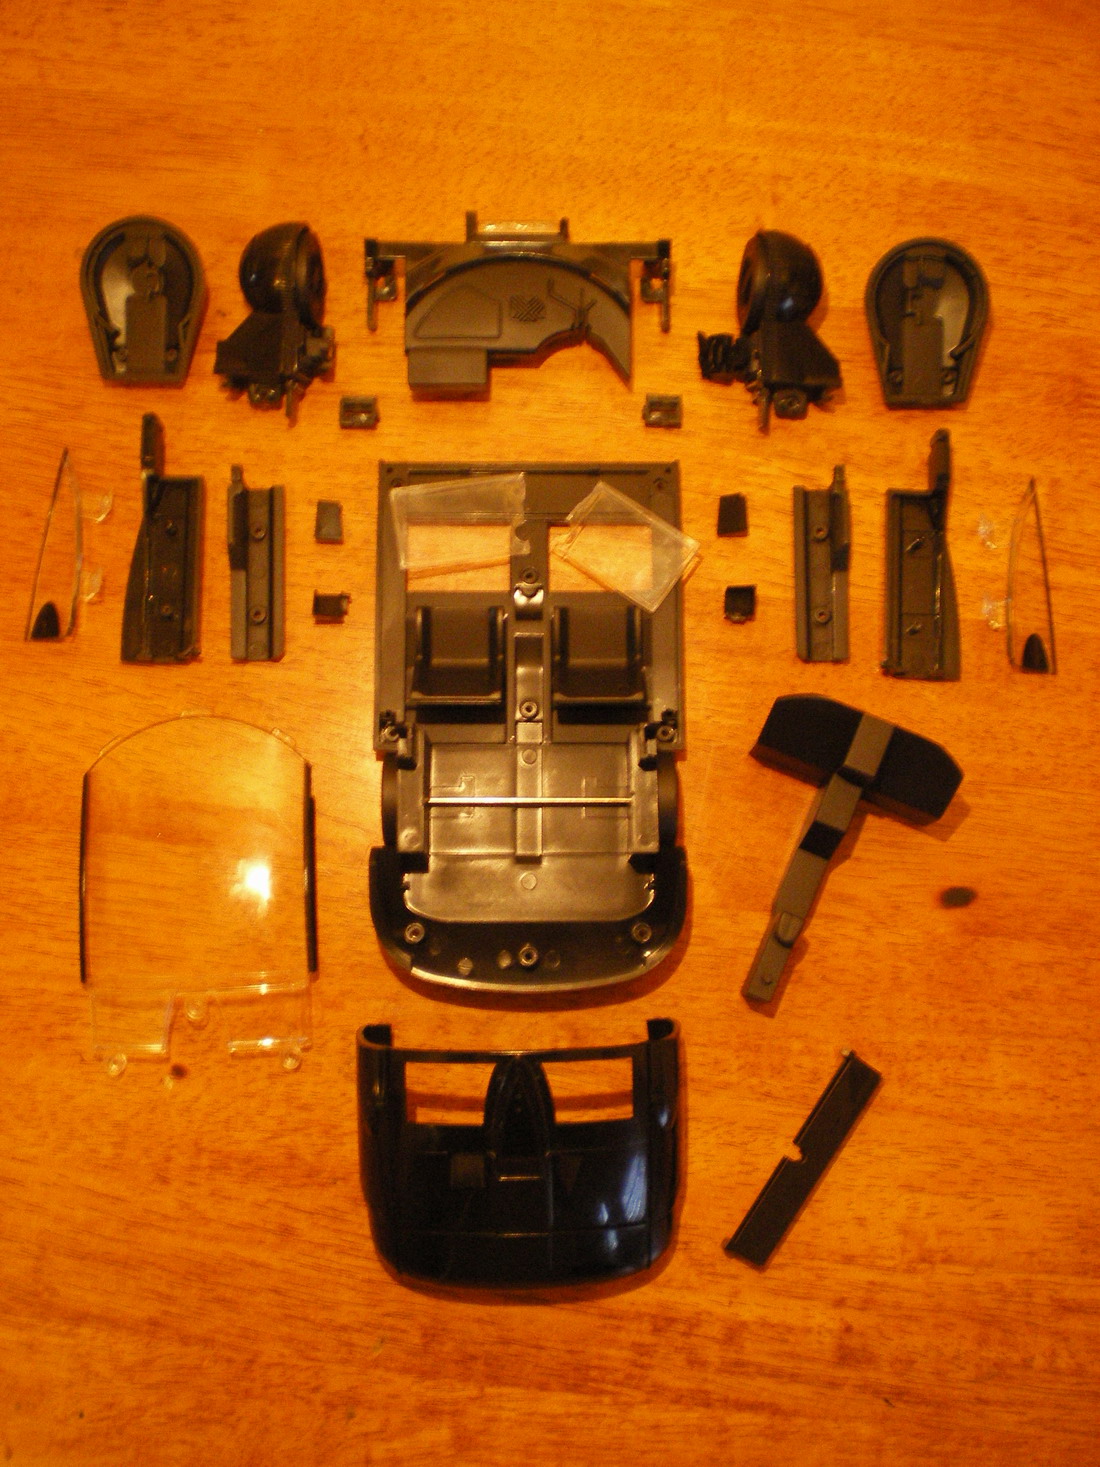
Now the process of painting and assembling the various pieces of the upgrade kit can begin, will update as this progresses.
_________________
Formerly offworld66
Last edited by Mr Webber on Thu Sep 24, 2009 7:39 am; edited 5 times in total |
|
| Back to top |
|
|
|
|
 |
|
 |
|
|
|
|
| Author |
Message |
hirohawa
Community Member

Joined: 18 May 2006
Posts: 1067
|
| Posted: Thu Jul 09, 2009 3:09 pm Post subject: |
|
|
This is awesome. I just picked up one of these Medicom spinners and am so glad you are doing this.
Thanks |
|
| Back to top |
|
|
|
|
|
|
|
|
|
|
|
| Author |
Message |
superjedi
Community Member

Joined: 02 Apr 2007
Posts: 389
Location: Newport News, VA
|
| Posted: Thu Jul 09, 2009 3:26 pm Post subject: |
|
|
Nice! I did a repaint on my Medicom "flying car" a couple of years ago, but missed out on the interior conversion kit.
Looking forward to seeing how yours progresses.
_________________
I find your lack of faith disturbing. . . |
|
| Back to top |
|
|
|
|
|
|
|
|
|
|
|
| Author |
Message |
Mr Webber
Community Member
Joined: 13 Apr 2008
Posts: 1824
Location: Terra Australis
|
| Posted: Thu Jul 09, 2009 7:32 pm Post subject: |
|
|
Cool. The crowning piece on this one will be the fully functioning,battery powered lightbar. Theres enough room in the tear drop molds to squeeze in four LEDS,
this will reproduce the revolving light effect and should be awesome. 
_________________
Formerly offworld66 |
|
| Back to top |
|
|
|
|
|
|
|
|
|
|
|
| Author |
Message |
joberg
Community Member
.jpg)
Joined: 06 Oct 2008
Posts: 9447
|
| Posted: Fri Jul 10, 2009 6:18 am Post subject: |
|
|
Cool build Tim! Thanks for the tutorial; looking forward to the rest of the project  |
|
| Back to top |
|
|
|
|
|
|
|
|
|
|
|
| Author |
Message |
Mr Webber
Community Member
Joined: 13 Apr 2008
Posts: 1824
Location: Terra Australis
|
| Posted: Sun Jul 12, 2009 2:44 am Post subject: |
|
|
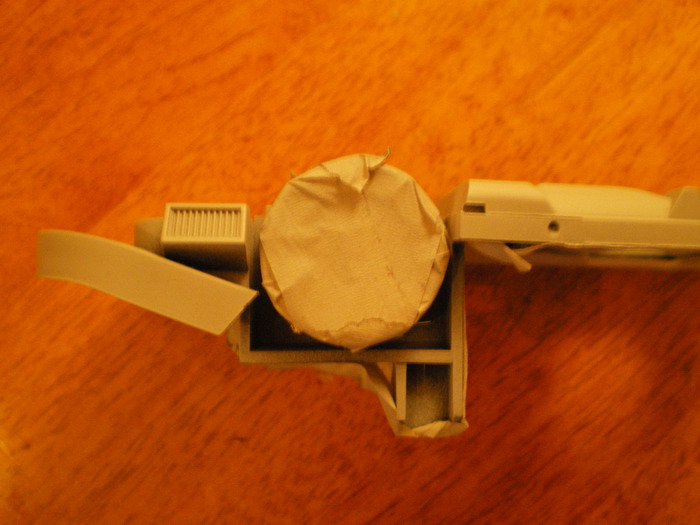
It is essential to prime the spinner before painting as the black colour will absorb many coats of paint with little result without it. The Tamiya light grey works best for me. You will need to mask up both sets of wheels
and the clear plastic front light window as this is easier than removing them.
 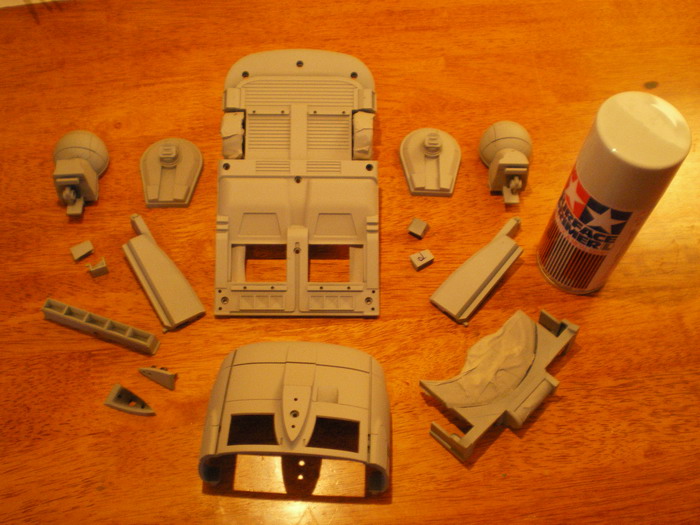
STARTING THE UPGRADE CONVERSION
As most of the upgrade kit is concerned with the cockpit, a few items have to be removed from the medicom before installation can begin.
The two plastic seats will have to be removed, this is tricky to say the least as they are stuck in there good. I just rocked each seat backwards and fowards with increasing pressure till they popped. If your lucky enough to snap of the post as well your done if not, they have to be removed as the new seats need the space.
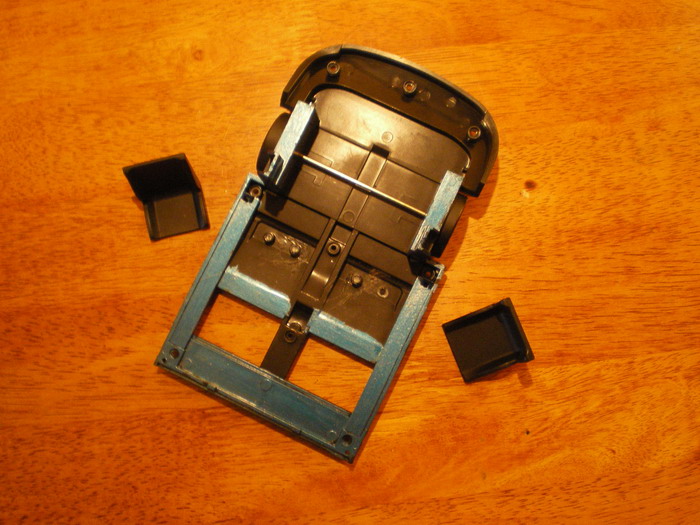 
The existing monitor screen in the medicom will also have to be removed,
be carefull not to cut to much as i have as i will now have to patch it up somehow. The medicom centre console is also not required and the interior piece from each door is not required,
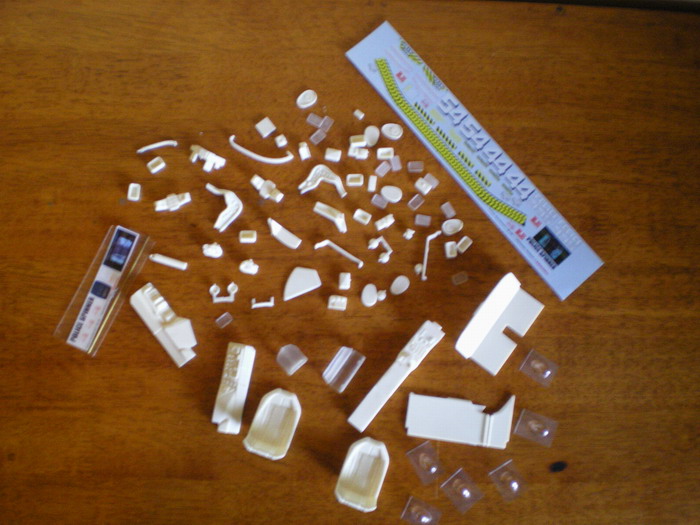
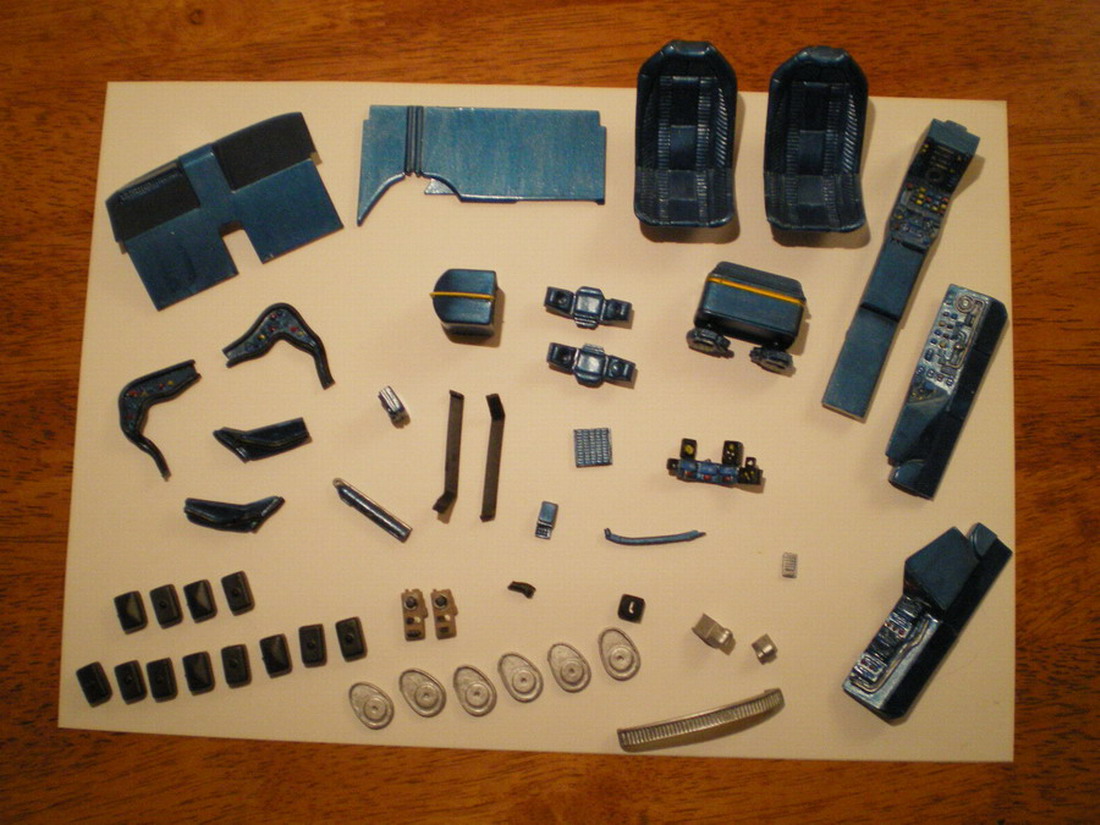
Here are the upgrade parts 97% completed. The blue i used is a Tamiya X-13.
_________________
Formerly offworld66 |
|
| Back to top |
|
|
|
|
|
|
|
|
|
|
|
| Author |
Message |
temponaut
Community Member

Joined: 19 Apr 2006
Posts: 440
Location: Tokyo, Japan
|
| Posted: Sun Jul 12, 2009 6:22 am Post subject: |
|
|
Looking good, Tim! Watching this thread with great anticipation! 
_________________
"Your old titles mean nothing here... Captain!" |
|
| Back to top |
|
|
|
|
|
|
|
|
|
|
|
| Author |
Message |
daikaiju1
Community Member
.jpg)
Joined: 12 Jul 2009
Posts: 12
Location: Australia
|
| Posted: Sun Jul 12, 2009 8:40 am Post subject: |
|
|
Hello, great thread! I have just bought one of the Medicom Spinners, (not arrived yet), can anyone help me with where I can purchase the resin conversion set? It would save me ALOT of scratchbuilding work.
Thanks GS
_________________
I want more detail, Father! |
|
| Back to top |
|
|
|
|
|
|
|
|
|
|
|
| Author |
Message |
joberg
Community Member
Joined: 06 Oct 2008
Posts: 9447
|
| Posted: Mon Jul 13, 2009 6:35 am Post subject: |
|
|
Yes Tim, looking good so far...eager to see the final result  |
|
| Back to top |
|
|
|
|
|
|
|
|
|
|
|
| Author |
Message |
Mr Webber
Community Member
Joined: 13 Apr 2008
Posts: 1824
Location: Terra Australis
|
| Posted: Mon Jul 13, 2009 7:58 am Post subject: |
|
|
Thanks guys.
daikaiju1, i got the kit from NYzeki, who is a member of this board, try sending him a personal message.
_________________
Formerly offworld66 |
|
| Back to top |
|
|
|
|
|
|
|
|
|
|
|
| Author |
Message |
SKIN JOB 66
Community Member

Joined: 16 Jan 2008
Posts: 2724
Location: FRANCE
|
| Posted: Mon Jul 13, 2009 9:31 am Post subject: |
|
|
Great project, Tim !!!
Since I have the same Medicom Spinner and conversion kit (and no time at all to work on them right now), I can't wait to see your next pics !!!
Fred
_________________
THE FUTURE IS A THING OF THE PAST |
|
| Back to top |
|
|
|
|
|
|
|
|
|
|
|
| Author |
Message |
daikaiju1
Community Member
Joined: 12 Jul 2009
Posts: 12
Location: Australia
|
| Posted: Mon Jul 13, 2009 6:53 pm Post subject: |
|
|
Hi TTim, thank you for the info, I will try to contanct NYzeki.
In the meantime, can't wait to see your further progress.
_________________
I want more detail, Father! |
|
| Back to top |
|
|
|
|
|
|
|
|
|
|
|
| Author |
Message |
Mr Webber
Community Member
Joined: 13 Apr 2008
Posts: 1824
Location: Terra Australis
|
| Posted: Wed Jul 22, 2009 8:06 pm Post subject: |
|
|
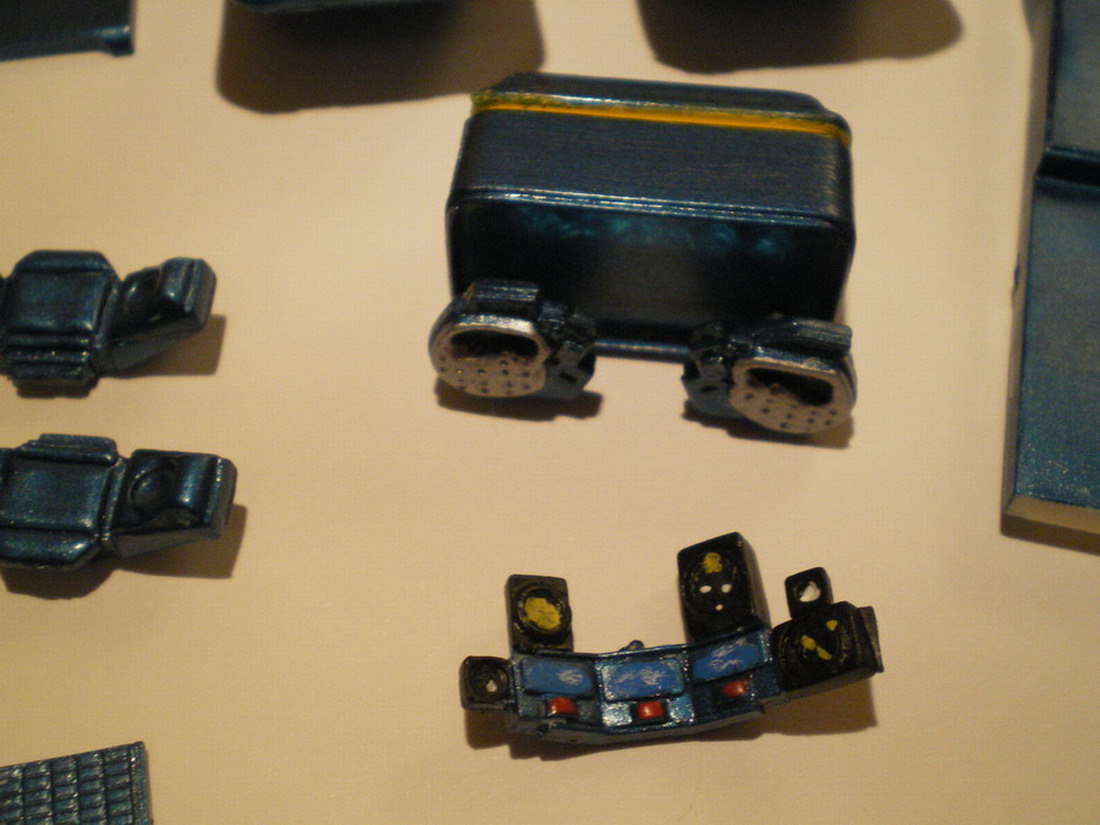
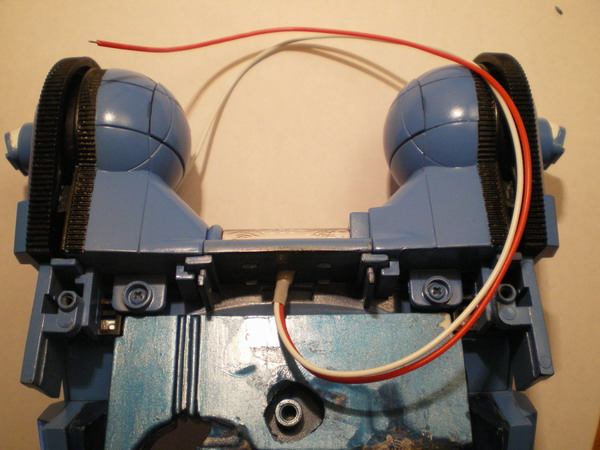
Here are some more progress pics. There is no specific order you have to follow when installing the interior except the clear floor panels, they have to go in first.
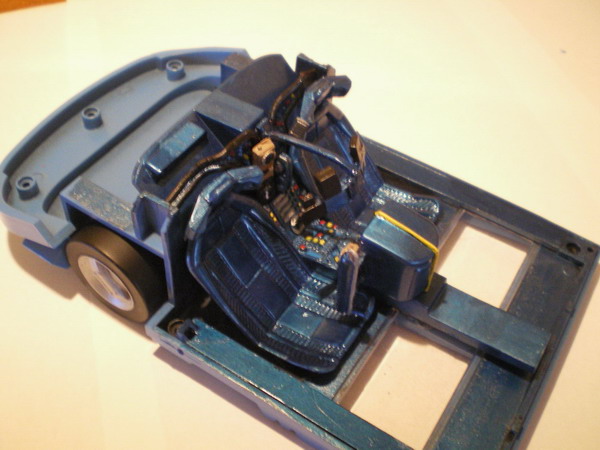 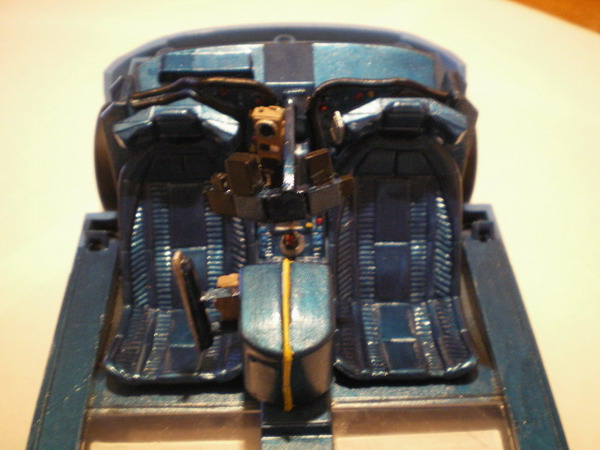
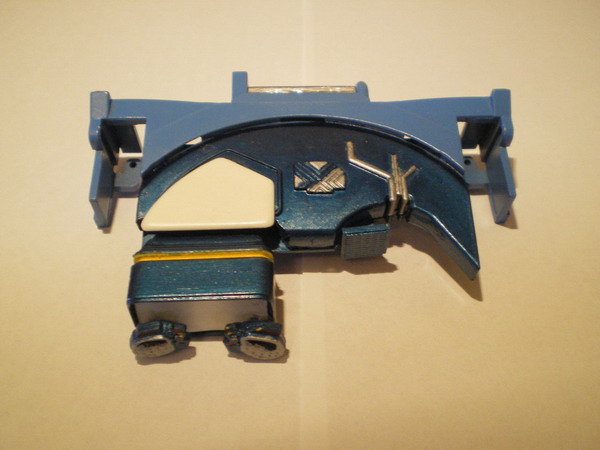 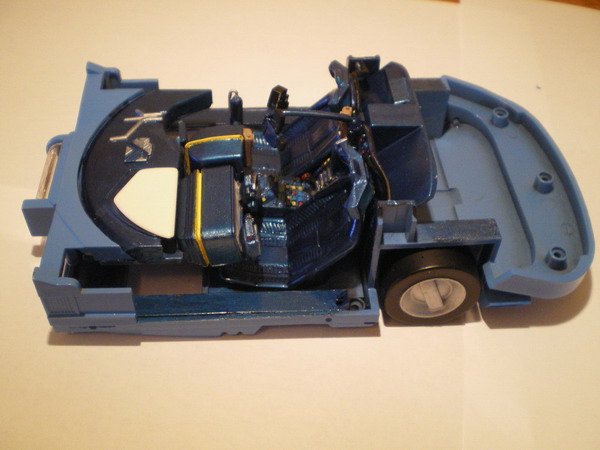
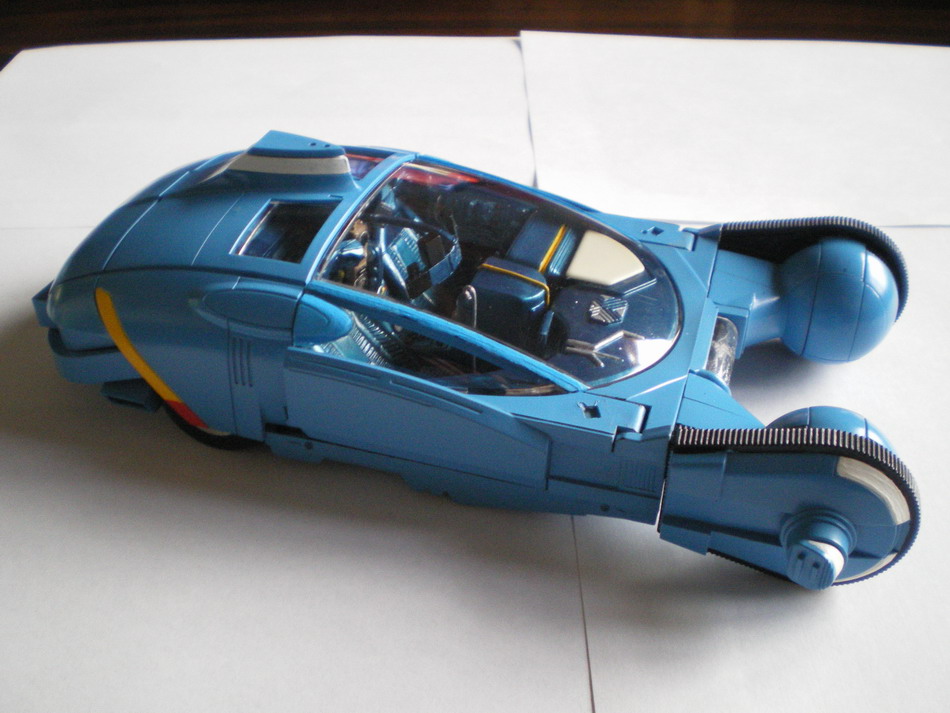

Now the hard work for me begins. The one thing that will determine
if the spinner has a practicle light bar or not are the tear drop molds.
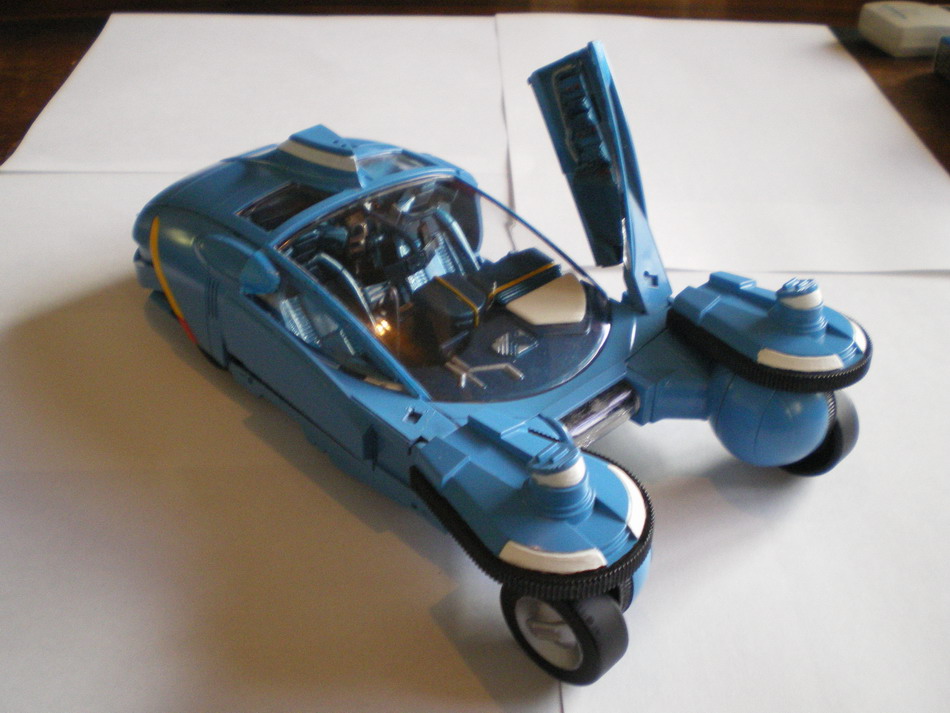
The only option i have with them is to paint them with clear colour and that is notoriously hard to work with. If the clear doesnt work i will have to go with a solid colour which means no lights.
Ive made a start on the front light................
The last thing will be the decals. Never had any luck with them and am dredding this stage of the conversion...............
_________________
Formerly offworld66 |
|
| Back to top |
|
|
|
|
|
|
|
|
|
|
|
| Author |
Message |
andy
Community Guide

Joined: 01 Nov 2006
Posts: 6237
Location: Rochester, NY
|
| Posted: Wed Jul 22, 2009 10:06 pm Post subject: |
|
|
Looking great.
Andy |
|
| Back to top |
|
|
|
|
|
|
|
|
|
|
|
| Author |
Message |
Gaff87
Community Member

Joined: 05 Oct 2008
Posts: 1727
Location: United Kingdom
|
| Posted: Thu Jul 23, 2009 5:25 am Post subject: |
|
|
Great work, Tim!!
You make everything look easy. |
|
| Back to top |
|
|
|
|
|
|
|
|
|
|
|
| Author |
Message |
SKIN JOB 66
Community Member
Joined: 16 Jan 2008
Posts: 2724
Location: FRANCE
|
| Posted: Thu Jul 23, 2009 6:01 am Post subject: |
|
|
EXCELLENT WORK AND PICS, BRAVO TIM !!!
Fred
_________________
THE FUTURE IS A THING OF THE PAST |
|
| Back to top |
|
|
|
|
|
|
|
|
|
|
|
| Author |
Message |
joberg
Community Member
Joined: 06 Oct 2008
Posts: 9447
|
| Posted: Thu Jul 23, 2009 6:25 am Post subject: |
|
|
A trick my Father used while applying decals (on any surface)is soap!
After you detached your decal from their backing, put a little dish-soap on the surface of your model, slide the decal on the surface and with a cloth, dabb the surface dry...voilà.
The soap makes it easy to play, and place, your decal on the right spot without fear of tearing it
P.S. Sharp work so far Tim |
|
| Back to top |
|
|
|
|
|
|
|
|
|
|
|
| Author |
Message |
Mr Webber
Community Member
Joined: 13 Apr 2008
Posts: 1824
Location: Terra Australis
|
| Posted: Thu Jul 23, 2009 9:40 am Post subject: |
|
|
Cheers guys and many thanks for the soap tip J, I feel better about the whole thing now. Would love to see some pics of your Dads work if thats possible.
Tim.
_________________
Formerly offworld66 |
|
| Back to top |
|
|
|
|
|
|
|
|
|
|
|
| Author |
Message |
joberg
Community Member
Joined: 06 Oct 2008
Posts: 9447
|
| Posted: Thu Jul 23, 2009 11:08 am Post subject: |
|
|
Thanks Tim, but since he retired 20 years ago (graphic artist) his work doesn`t involve any decals of any sorts  . .
His focus has been the making of short films (and everything associated with the process)...that`s where my gift comes from: the Father. |
|
| Back to top |
|
|
|
|
|
|
|
|
|
|
|
| Author |
Message |
propsjonnyb
Community Member
Joined: 16 Jul 2009
Posts: 476
Location: Helmdon, Northamptonshire UK
|
| Posted: Fri Jul 24, 2009 4:18 pm Post subject: Medicom Conversion |
|
|
Excellent work , I have a Medicom too , and am waiting on the upgrade kit , whilst I am waiting, I am scratch building a 1:12 Scale version , I have already designed and built the prototype lighting rig , I have been experimenting with clear-casting resin and resin dyes to create the teardtop and box lights we all know and love ! 5mm high bright LEd's for the teardrops and 3.5 mm for the box lights . I have found that the best way is to make up the led and bind the end with a little shrink tubing and then after pouring the clearcast resin gently set the led into the mold and let set completely. For really excellent results polish the clear cast with Brasso or DuraGlit polishing wad, and then coat with transparent glass paints one coat will normally do it, two if you want a deeper colour . When I've finished mine , I post photo's and a video clip.
Just into sculpting a Gaff and Deckard at the moment with turning heads ! |
|
| Back to top |
|
|
|
|
|
|
|
|
|
|
|
|
You cannot post new topics in this forum
You cannot reply to topics in this forum
You cannot edit your posts in this forum
You cannot delete your posts in this forum
You cannot vote in polls in this forum
|
|
|
|
|
|
|
|