|
 |
|
 |
|
| Author |
Message |
RedArc
Community Member

Joined: 23 Sep 2010
Posts: 73
Location: Austria , Europe
|
 Posted: Sat May 21, 2011 10:04 am Post subject: Showoff : L.E. Coyle Kit with Blaster Core v3.1 Posted: Sat May 21, 2011 10:04 am Post subject: Showoff : L.E. Coyle Kit with Blaster Core v3.1 |
 |
|
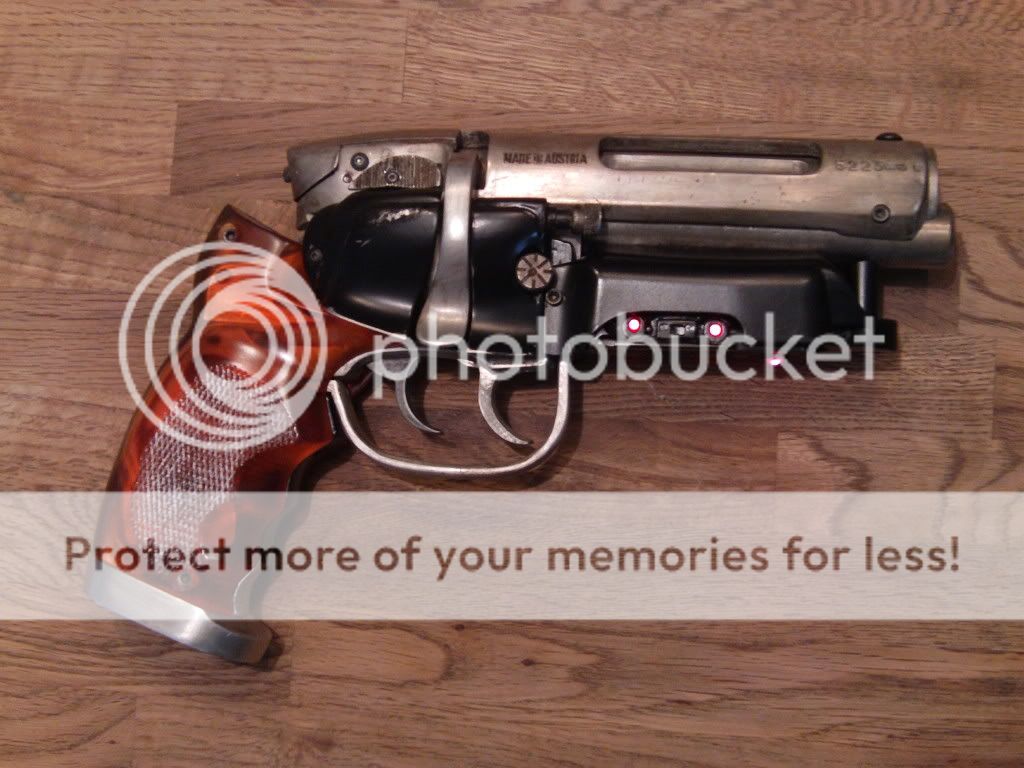
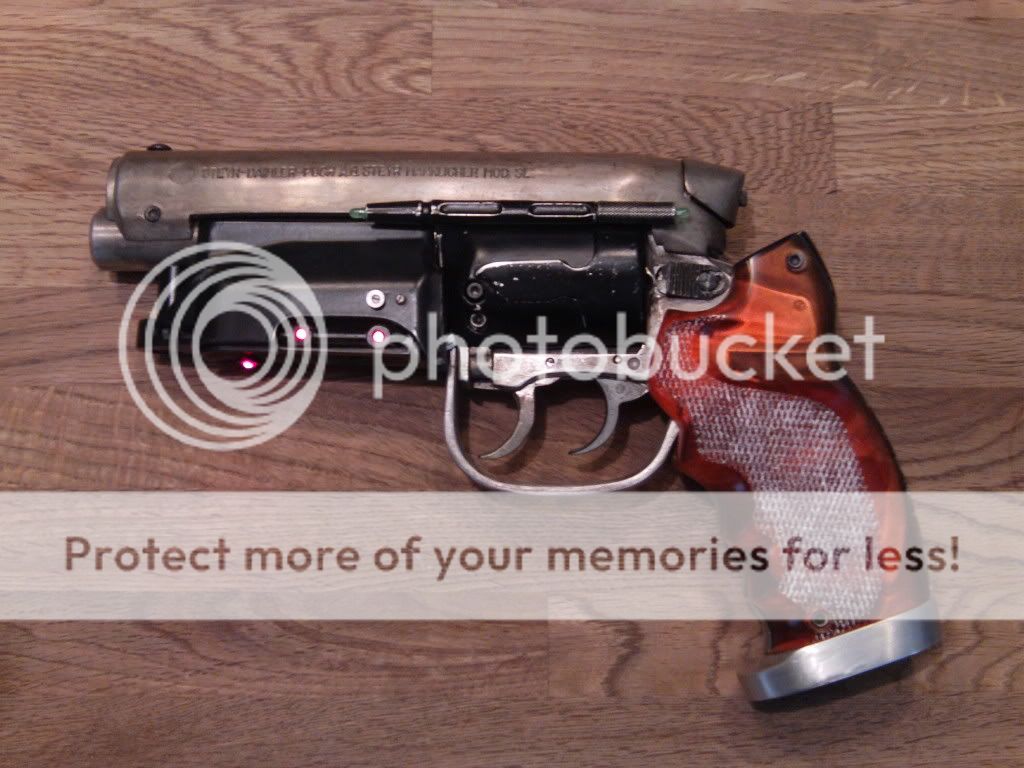
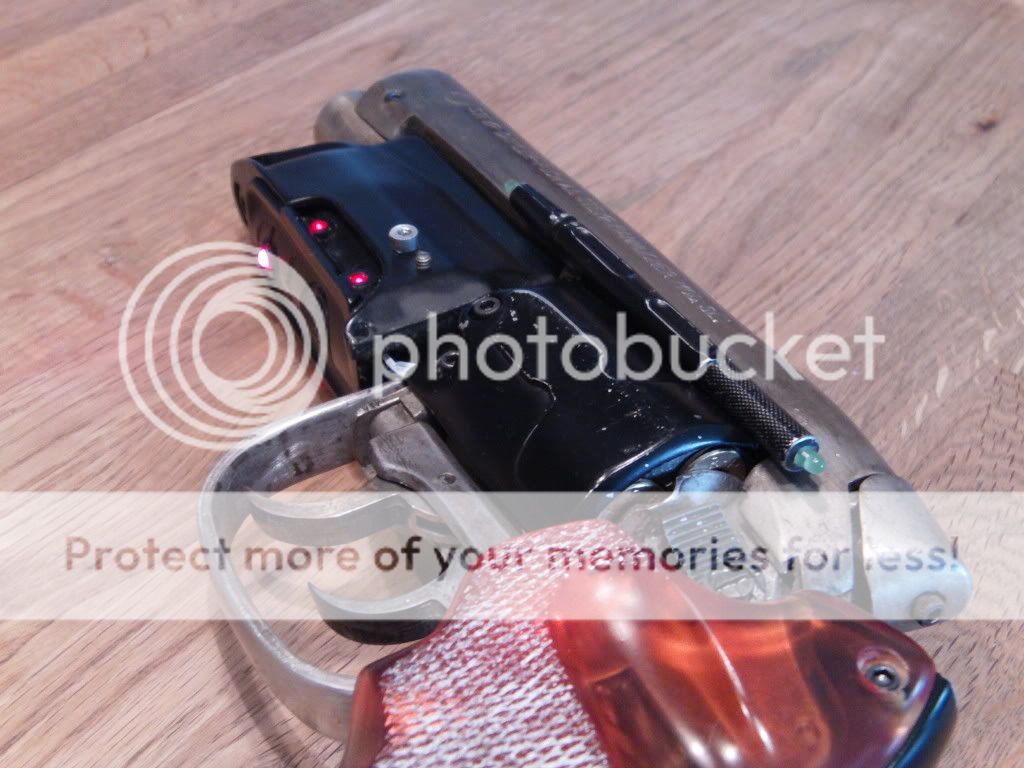
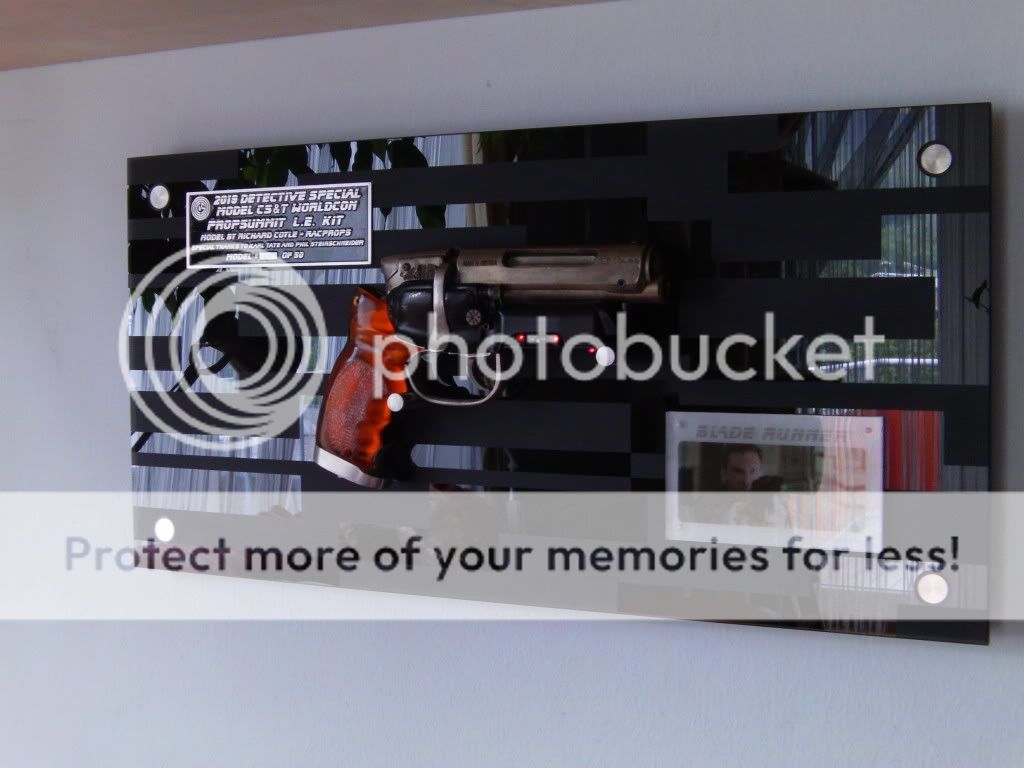
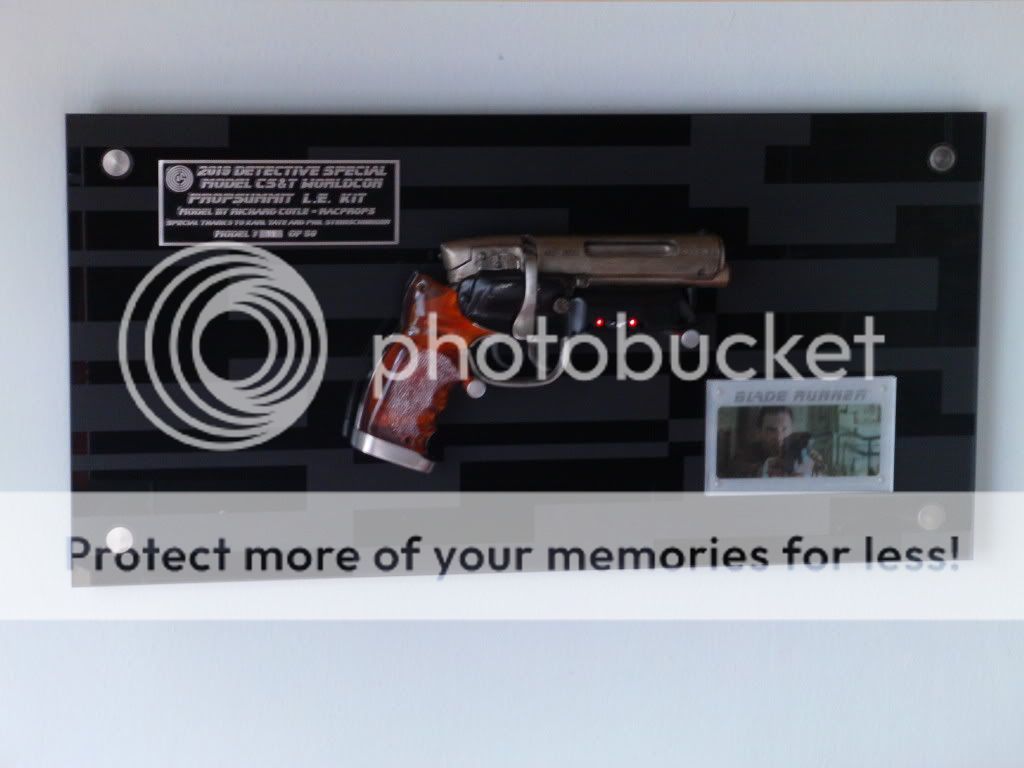
I´m happy to present my finished L.E. Coyle Kit with an BC v3.1 soundboard from Plecter Labs
( known here as Erv´ , he´s the creator of that awesome soundboard ! )
First i have to say that this Kit is not for peoble without any experience with prop building .
While building i had some situations where you have to find a way for yourself to get furhter but all in all its an awesome kit and i was surprised how easy it is to work with pewter .
Thanks to Rich an propsjonnyb for making this possible !
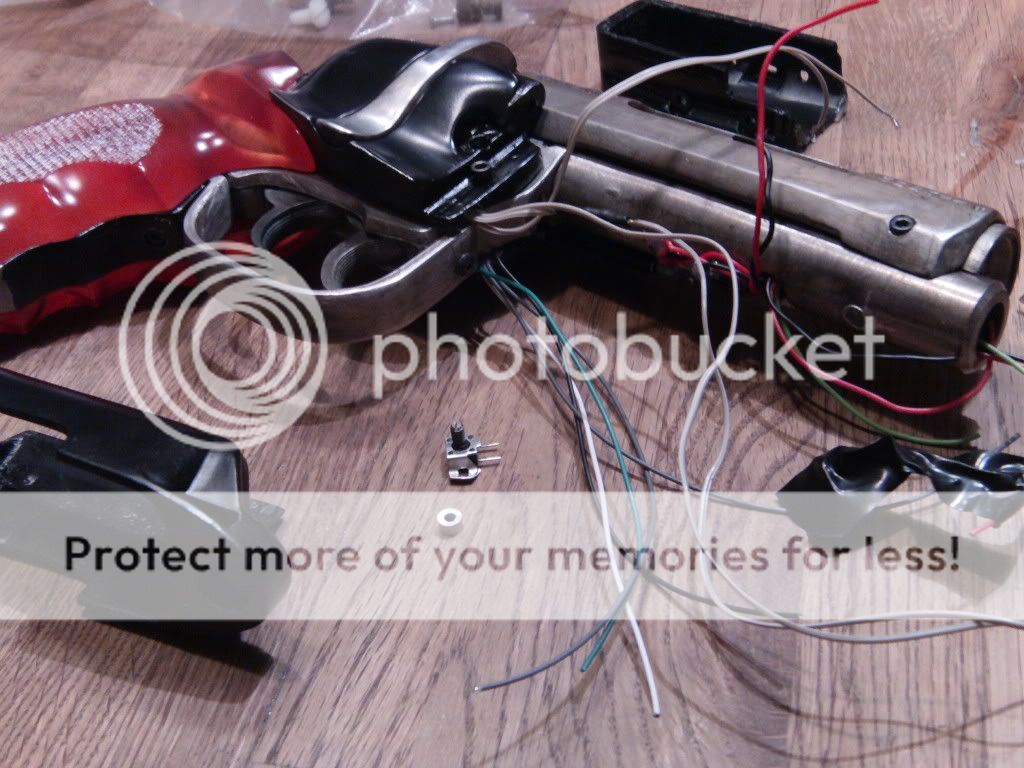
Also the wiring is always some kind of tricky but with some elbow grease i finally soldered all wires on the right places ^^


For the weathering i tryed to get an close look to the worldcon version but never wanted to get the exact copy of an worldcon ( not skilled enought ^^ )
I did all the pewter weathering with aluminium black . Quick apply and then fast wipe all off .
Repeated it a few times to get an nice used look .


Specs :
2x 10440 trustfire for 7,4v
2,1 mm recharge bort hidden in the receiver
2w Premium speaker inside the drum
5 leds in the ammo box
2 green 3mm leds on the sight rod for ray flash
2 x ultrabright 5mm red and blue (3,4v , 20ma ,18500 mcd )
for main flash and auxflash in the barrel
rumble motor in the grip section
sound fonts :
Deckard Blade Runner
Half Life 2 ( combine )
the dutch
Plecter Blaster
??????????
DH-17
I-saber tracks : full BR soundtrack + Zora street chasing scene
Demo vid : http://www.youtube.com/watch?v=adpYFzl6tOU
An at last my custom wall display
Made from an Glas wall slab i found in an hardware store .
Maybe you can find my cat with your Esper machine 

So , that´s it guys , hope you like it  |
|
| Back to top |
|
|
|
|
 |
|
 |
|
|
|
|
| Author |
Message |
jameth
Community Member
Joined: 02 Feb 2010
Posts: 825
|
| Posted: Sat May 21, 2011 10:14 am Post subject: |
|
|
Wow!!!!!!!!!!!!!!! That is very very impressive.
Excellent work!!!! |
|
| Back to top |
|
|
|
|
|
|
|
|
|
|
|
| Author |
Message |
Staar
Community Member

Joined: 04 Feb 2008
Posts: 757
Location: AUSTRALIA
|
| Posted: Sat May 21, 2011 10:40 am Post subject: |
|
|
That's a sweet build and a VERY sweet display mate.
Warmest congratulations. Its richly deserved!
Highest regards
MARK
_________________
 |
|
| Back to top |
|
|
|
|
|
|
|
|
|
|
|
| Author |
Message |
cratercritter
Community Member
Joined: 15 Jul 2009
Posts: 558
|
| Posted: Sat May 21, 2011 11:55 am Post subject: |
|
|

Excellent work. Nice looking blaster
.... and to top it off, a cool looking display plaque  |
|
| Back to top |
|
|
|
|
|
|
|
|
|
|
|
| Author |
Message |
AaronD82
Community Member

Joined: 05 Jan 2010
Posts: 93
Location: Bournemouth, England
|
| Posted: Sat May 21, 2011 12:19 pm Post subject: |
|
|
| Amazing, just amazing |
|
| Back to top |
|
|
|
|
|
|
|
|
|
|
|
| Author |
Message |
andy
Community Guide

Joined: 01 Nov 2006
Posts: 6237
Location: Rochester, NY
|
| Posted: Sat May 21, 2011 2:22 pm Post subject: |
|
|
Wow, that is truly awesome.
Andy |
|
| Back to top |
|
|
|
|
|
|
|
|
|
|
|
| Author |
Message |
phase pistol
Community Member
Joined: 04 Nov 2006
Posts: 1147
|
| Posted: Sat May 21, 2011 2:27 pm Post subject: |
|
|
That looks fantastic! 
Incidentally I was able to get my Coyle grips looking nearly water-clear, by taking them off and polishing them with a microfiber cloth and some aluminum polish. Be sure to polish the inside of the grip as well.

Coyle (bottom) along with the Tomenosuke PRO

http://www.flickr.com/photos/12377578@N07/5466324927/
Last edited by phase pistol on Sun May 22, 2011 12:59 am; edited 1 time in total |
|
| Back to top |
|
|
|
|
|
|
|
|
|
|
|
| Author |
Message |
racprops
Community Member

Joined: 30 Oct 2006
Posts: 2450
Location: Phoenix AZ
|
| Posted: Sat May 21, 2011 3:22 pm Post subject: |
|
|
Looks great, want a job???
Phaserpistol is right a good polish really cleans up the grips, thanks to his tip I am doing all the buildups with polished grips.
Rich
_________________
I never have enough time to do all I want to do! |
|
| Back to top |
|
|
|
|
|
|
|
|
|
|
|
| Author |
Message |
RedArc
Community Member
Joined: 23 Sep 2010
Posts: 73
Location: Austria , Europe
|
| Posted: Sat May 21, 2011 3:25 pm Post subject: |
|
|
Thanks a lot guys , means a lot to me , getting compliments from the real fans and experts
My girlfriend saw that glas wall slab in the store while i was watching for some black plexiglas . She showed it to me and the idea for that dislpay popped up in my head ^^
| phase pistol wrote: | That looks fantastic!
Incidentally I was able to get my Coyle grips looking nearly water-clear, by taking them off and polishing them with a microfiber cloth and some aluminum polish. Be sure to polish the inside of the grip as well.
|
Thanks for that advice Karl , i will try it for sure |
|
| Back to top |
|
|
|
|
|
|
|
|
|
|
|
| Author |
Message |
Daddy Solo
Community Member

Joined: 03 Jan 2011
Posts: 72
Location: NY
|
| Posted: Sat May 21, 2011 5:30 pm Post subject: |
|
|
| great job - see my reply on FX saber forum. each time I look at the pics, I can't imagine how much work went into this. |
|
| Back to top |
|
|
|
|
|
|
|
|
|
|
|
| Author |
Message |
AaronD82
Community Member
Joined: 05 Jan 2010
Posts: 93
Location: Bournemouth, England
|
| Posted: Sat May 21, 2011 6:52 pm Post subject: |
|
|
I would love to see a video with the electronics  |
|
| Back to top |
|
|
|
|
|
|
|
|
|
|
|
| Author |
Message |
RedArc
Community Member
Joined: 23 Sep 2010
Posts: 73
Location: Austria , Europe
|
| Posted: Sat May 21, 2011 11:57 pm Post subject: |
|
|
| AaronD82 wrote: | | I would love to see a video with the electronics |
Dont know what you mean exactly !
Do you want to see the inner life of the ammo box ?
Its an real mess ^^ You won´t see much if i open it up exept a lot of cables and the board ! |
|
| Back to top |
|
|
|
|
|
|
|
|
|
|
|
| Author |
Message |
hirohawa
Community Member

Joined: 18 May 2006
Posts: 1067
|
| Posted: Sun May 22, 2011 12:34 am Post subject: |
|
|
| phase pistol wrote: | That looks fantastic!
Incidentally I was able to get my Coyle grips looking nearly water-clear, by taking them off and polishing them with a microfiber cloth and some aluminum polish. Be sure to polish the inside of the grip as well.
http://www.flickr.com/photos/12377578@N07/5466324927/ |
WHich aluminum polish do you use?
Looks great! |
|
| Back to top |
|
|
|
|
|
|
|
|
|
|
|
| Author |
Message |
phase pistol
Community Member
Joined: 04 Nov 2006
Posts: 1147
|
| Posted: Sun May 22, 2011 12:38 am Post subject: |
|
|
| "Mother's Mag and Aluminum Polish" |
|
| Back to top |
|
|
|
|
|
|
|
|
|
|
|
| Author |
Message |
joberg
Community Member
.jpg)
Joined: 06 Oct 2008
Posts: 9463
|
| Posted: Sun May 22, 2011 6:47 pm Post subject: |
|
|
Excellent build and the display rocks (the cat is at the bottom left hand side of the display  ). ).
Karl, those pics with the Tome and the Coyle are rocking big time |
|
| Back to top |
|
|
|
|
|
|
|
|
|
|
|
| Author |
Message |
Mitch Magnum PKD
Community Member

Joined: 22 Jan 2009
Posts: 129
Location: Halifax, Nova Scotia
|
| Posted: Mon May 23, 2011 8:44 am Post subject: |
|
|
Sooo lovely.
EXCELLENT work!
_________________
Memories... You're talking about memories... |
|
| Back to top |
|
|
|
|
|
|
|
|
|
|
|
| Author |
Message |
corellian77
Community Member

Joined: 29 May 2011
Posts: 58
|
| Posted: Mon May 30, 2011 8:13 pm Post subject: |
|
|
Very nice! I watched your video, and love the weathered look you've achieved on the upper receiver. I couldn't quite make out what you said you used though... something "black" is all I could hear.
Just curious, as, in the event I save up enough funds to buy a CS&T 2011 myself at some point in the future, I'd like to get a similar look. |
|
| Back to top |
|
|
|
|
|
|
|
|
|
|
|
| Author |
Message |
racprops
Community Member
Joined: 30 Oct 2006
Posts: 2450
Location: Phoenix AZ
|
| Posted: Mon May 30, 2011 8:58 pm Post subject: |
|
|
Well I could send a fully built model less finishing, IE: No paint and no treatment to the metal.
A slight discount of $150.00 off.
Then you could work a deal for someone else to do the finishing.
Rich
_________________
I never have enough time to do all I want to do! |
|
| Back to top |
|
|
|
|
|
|
|
|
|
|
|
| Author |
Message |
RedArc
Community Member
Joined: 23 Sep 2010
Posts: 73
Location: Austria , Europe
|
| Posted: Tue May 31, 2011 1:00 am Post subject: |
|
|
| corellian77 wrote: | Very nice! I watched your video, and love the weathered look you've achieved on the upper receiver. I couldn't quite make out what you said you used though... something "black" is all I could hear.
Just curious, as, in the event I save up enough funds to buy a CS&T 2011 myself at some point in the future, I'd like to get a similar look. |
Brichwood & Casey Aluminium black |
|
| Back to top |
|
|
|
|
|
|
|
|
|
|
|
| Author |
Message |
markyzz

Joined: 22 Jul 2011
Posts: 1
|
| Posted: Fri Jul 22, 2011 8:48 am Post subject: |
|
|
WOW that was a great job RedArc.
_________________
They say fingers were made before forks, and hands before police baton.
-"markyzzykram"- |
|
| Back to top |
|
|
|
|
|
|
|
|
|
|
|
|
You cannot post new topics in this forum
You cannot reply to topics in this forum
You cannot edit your posts in this forum
You cannot delete your posts in this forum
You cannot vote in polls in this forum
|
|
|
|
|
|
|
|