|
 |
|
 |
|
| Author |
Message |
superjedi
Community Member

Joined: 02 Apr 2007
Posts: 389
Location: Newport News, VA
|
 Posted: Sun Jan 24, 2010 3:53 pm Post subject: Superjedi's Nostromo pistol Posted: Sun Jan 24, 2010 3:53 pm Post subject: Superjedi's Nostromo pistol |
 |
|
Hi all!
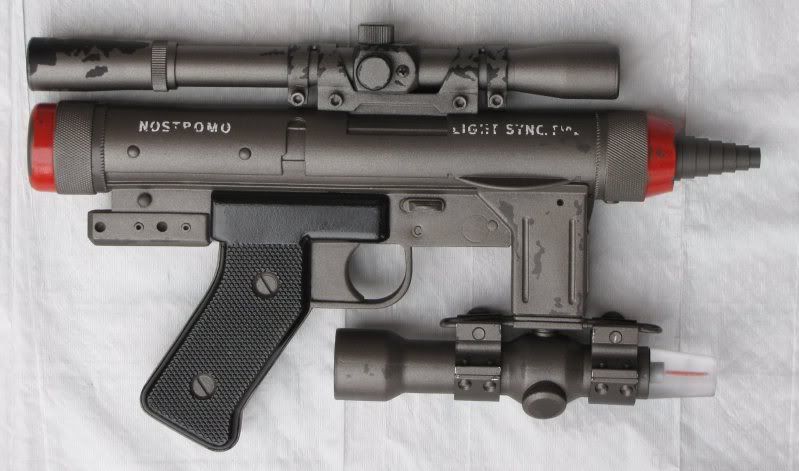
Had some time to work on the amazing Nostromo pistol kit by Shawn Morgan.
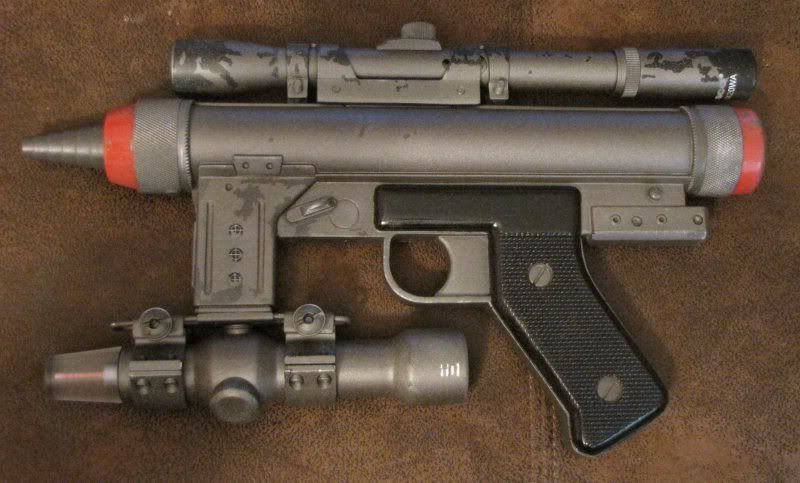
Very nicely cast kit! The Rexim is terrific, and the add on parts are great, too. There are a couple of metal parts comprising the upper and lower scope mounts, as well as a clear cone tip for the Singlepoint scope. The upper scope is a genuine functional Tasco scope. The "nozzle" at the muzzle end is a separate piece as well.
Shawn did all the prep and pre-assembly before shipping the kit. He did an excellent job on designing and constructing the pistol. It was basically ready to paint right out of the box. 
He also provided a painting tutorial, and a source for the rub-on lettering used on the pistol's receiver.
I didn't take any in progress shots on this, but since I decided to do a weathered version, I still have some more work to do.
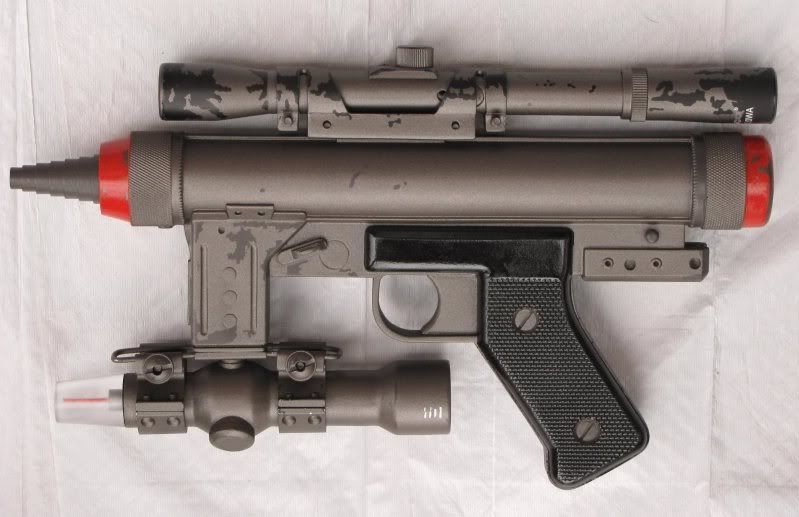
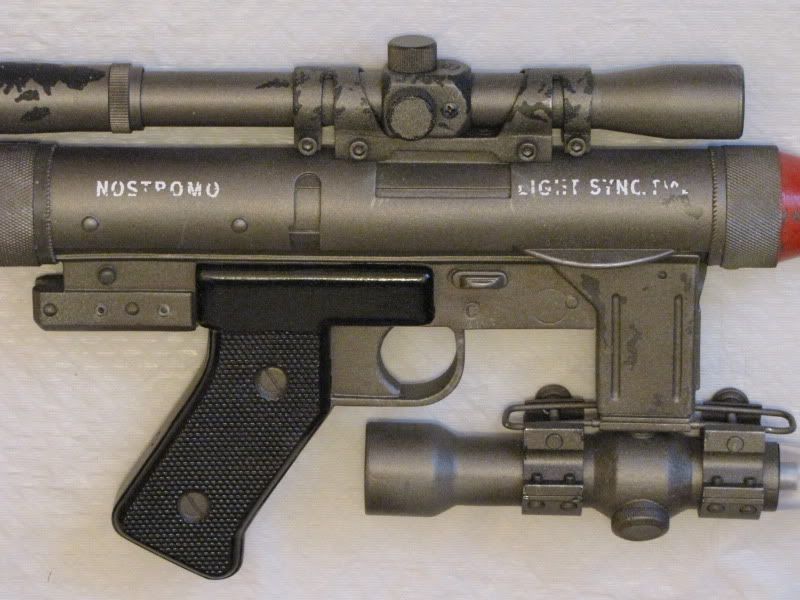
Here are a couple of overall shots of both sides.
I partially disassembled the kit to make painting a bit easier. I wound up with 5 subassemblies for painting:
1) main body
2) Singlepoint scope (removed scope rings)
3) Tasco scope
4) Tasco scope mount
5) front nozzle piece
I began by using Duplicolor self-etching primer on all the resin parts to make sure the color coats had something to bite on. I've used this primer before and it gives a very smooth base.
Shawn recommended a dark "machine" gray (or black) for the base color. I used a dark Rustoleum gray that I had left over from another project. I used the dark gray on the pistol body, Singlepoint scope, and nozzle.
I didn't paint the Tasco scope at all at this point as I wanted the black to show through my weathering. The resin Tasco scope mount was sprayed semi-flat black after primer.
After the base coat was dry I reassembled all components (except for the clear Singlepoint tip) in preparation for weathering.
To begin, I used some Winsor & Newton liquid mask with a Microbrush to mask off portions I wanted to show through the weathering. I've used this technique many times on other full scale props and helmets and it works really well.
Once the masking fluid was dry, I used Shawn's recommended Rustoleum Bronze color to apply several light coats over the entire pistol.
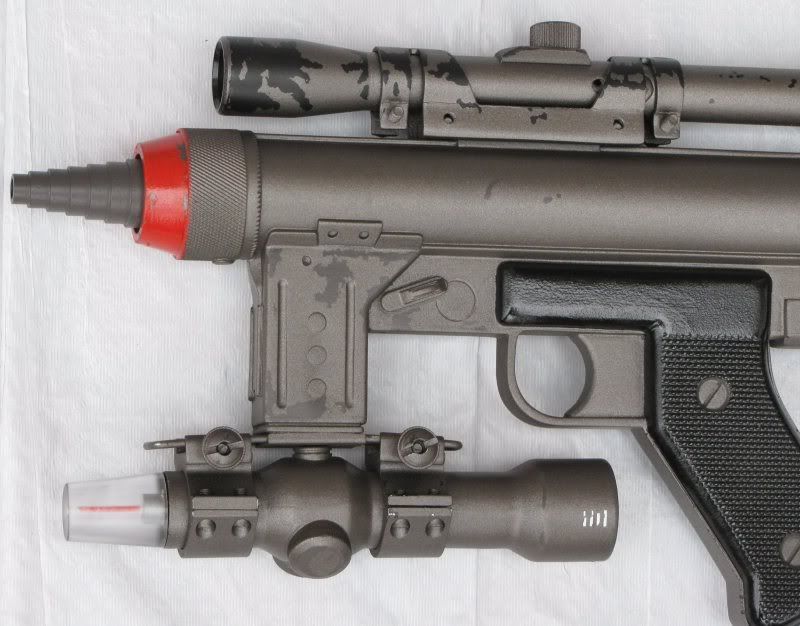
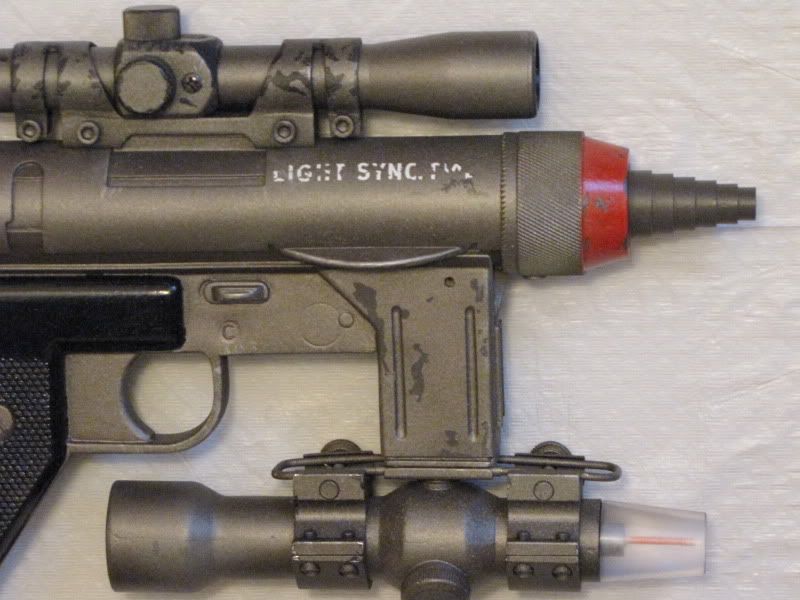
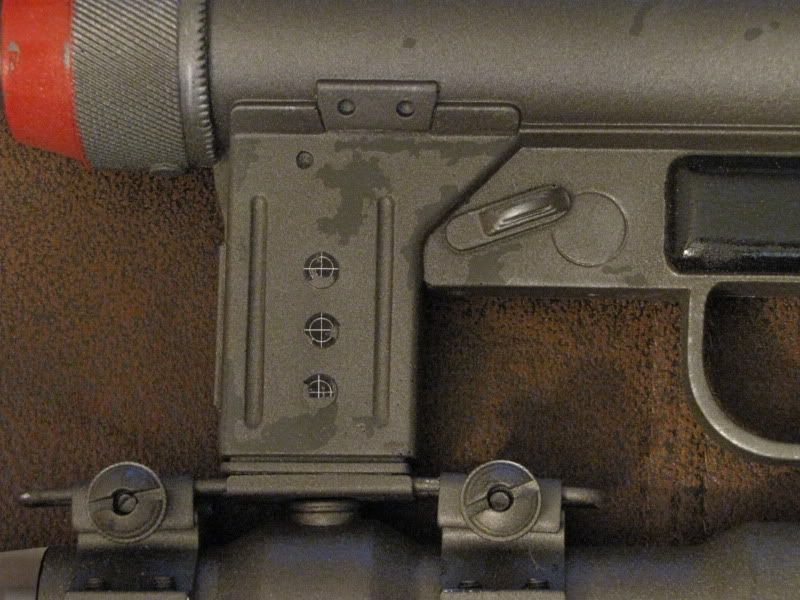
Once dry, I used a rubber cement pickup to rub off the masking fluid, and got a nice chipped effect. Here are a couple of closer shots.
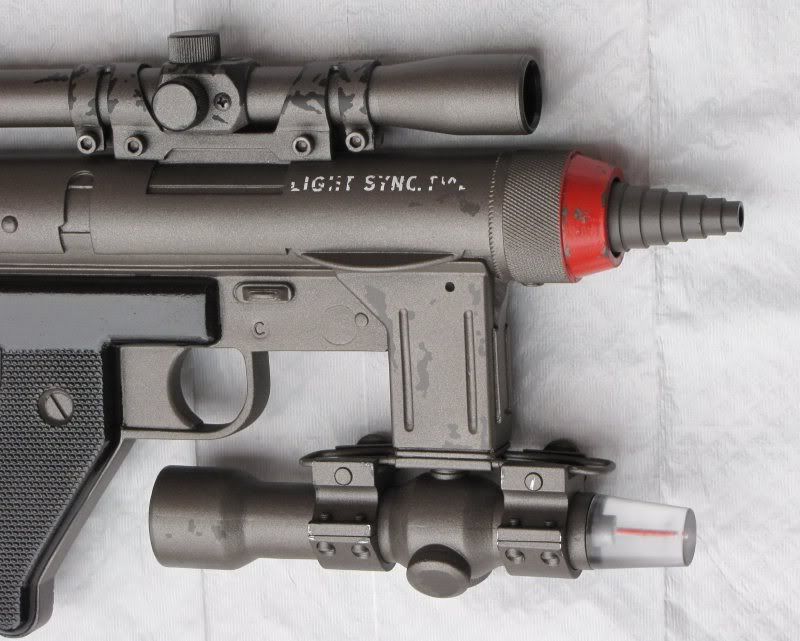
I did some more detailing by masking off for the red sections. I wrapped blue painters tape around both knurled sections and used the liquid mask again to mask off the chips and scratches. I used Testors Ford Engine Red, which (in my opinion) simulates the slightly orangish red on the pics of the screen used prop.
The grip panels were painted with Testors Gloss Black.
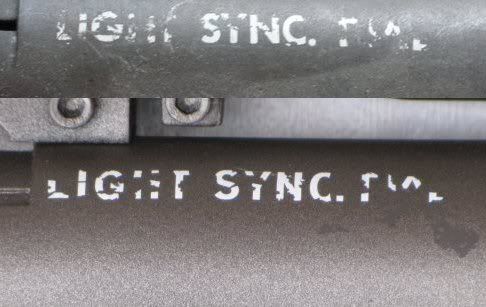
The lettering was done with white dry transfers. Since I wanted to mimic the screen used pistol, which has very worn lettering, I took some time to scratch and cut up each letter before applying them to the receiver. This took a while, but I really like the end result!
In the reference pics of the screen used pistol, the word "Nostromo" is quite noticeably slanted down to the right. . . but I simply couldn't bring myself to put it on crooked! 
EDIT: Just for fun, here's a comparison of the screen used pistol with the lettering on mine. (Credit to Jason Eaton for the original pic.) The original is on top of course. 
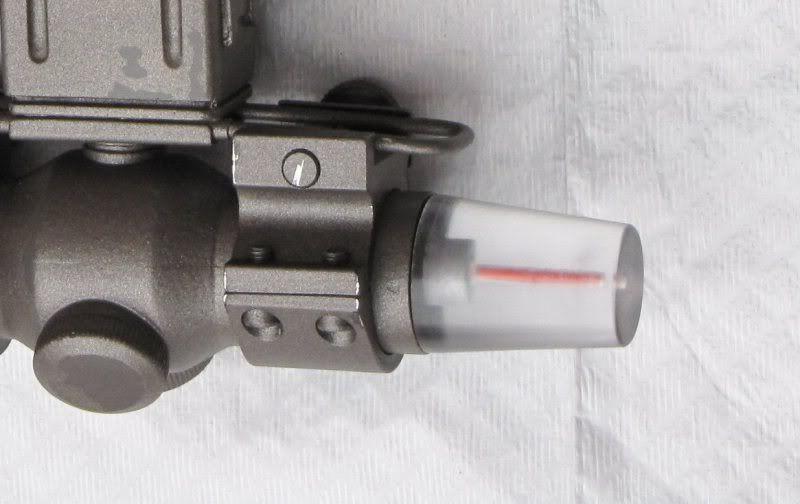
Shawn recommended using thinned red paint into the thin drilled out depression in the clear Singlepoint tip, but I found some thin red coated wire in my spares box that fit very nicely into the hole! I cut off a section and pressed it down inside. The clear tip was completed by painting the slightly larger depression silver, then the base was painted black.
So that's where she sits this afternoon.  Still to come: a general "dirtying down" of the entire pistol. Still to come: a general "dirtying down" of the entire pistol.
Then I'll find a display case and show it off next to my Nostromo AES helmet by Steve and Richie!
Thanks for reading,
Eric
_________________
I find your lack of faith disturbing. . . |
|
| Back to top |
|
|
|
|
 |
|
 |
|
|
|
|
| Author |
Message |
Mark Sheppard
Community Member

Joined: 18 Apr 2009
Posts: 951
Location: In my office playing golf, pouring drinks, making deals.
|
| Posted: Sun Jan 24, 2010 4:23 pm Post subject: |
|
|
That is just awesome Superjed!
How were you able to purchase this kit.. is it still available!!!??????
_________________
______________________________________
"Did you really destroy the ENTIRE shipment?"

www.alienthemovie.blogspot.com |
|
| Back to top |
|
|
|
|
|
|
|
|
|
|
|
| Author |
Message |
stephen210
Community Member
Joined: 07 Apr 2009
Posts: 196
|
| Posted: Sun Jan 24, 2010 4:31 pm Post subject: |
|
|
| excellent work. |
|
| Back to top |
|
|
|
|
|
|
|
|
|
|
|
| Author |
Message |
superjedi
Community Member
Joined: 02 Apr 2007
Posts: 389
Location: Newport News, VA
|
| Posted: Sun Jan 24, 2010 6:03 pm Post subject: |
|
|
Thanks, guys! It's an interesting looking pistol to be sure.
I'd love to get a kit of Ripley's spear gun at some point.
JT, just contact member Morganthirteen. He's still making the kits. I think it took less than 2 weeks to get mine from the time I paid. He does great work!
_________________
I find your lack of faith disturbing. . . |
|
| Back to top |
|
|
|
|
|
|
|
|
|
|
|
| Author |
Message |
morganthirteen
Community Guide
Joined: 20 May 2006
Posts: 60
|
| Posted: Sun Jan 24, 2010 9:45 pm Post subject: |
|
|
Eric, that looks wonderful. I love your "chipped" paint effect. I'm also impressed how fast you put it together!
And yes, though I've not started a public thread, I *am* offering these as both kits and full build ups.
Please PM for more details.
Shawn |
|
| Back to top |
|
|
|
|
|
|
|
|
|
|
|
| Author |
Message |
joberg
Community Member
.jpg)
Joined: 06 Oct 2008
Posts: 9471
|
| Posted: Mon Jan 25, 2010 7:44 am Post subject: |
|
|
Excellent work and tutorial SuperJedi!! The final result rocks for sure 
And a big thanks for Morganthirteen to make those available; good job! |
|
| Back to top |
|
|
|
|
|
|
|
|
|
|
|
| Author |
Message |
SKIN JOB 66
Community Member

Joined: 16 Jan 2008
Posts: 2724
Location: FRANCE
|
| Posted: Tue Jan 26, 2010 4:29 pm Post subject: |
|
|
same as Stephen, Shawn and joberg...
WOW Eric, love your work on the pistol (details, details, details, everything is in the details !) and I really can't wait to see the final aged version !!!
Well done !!!
Fred
_________________
THE FUTURE IS A THING OF THE PAST |
|
| Back to top |
|
|
|
|
|
|
|
|
|
|
|
| Author |
Message |
Space Jockey
Community Member

Joined: 13 Apr 2009
Posts: 559
Location: East Tennessee
|
| Posted: Thu Jan 28, 2010 11:29 am Post subject: |
|
|
| That is just beautiful. Excellent excellent work to both you and Shawn. |
|
| Back to top |
|
|
|
|
|
|
|
|
|
|
|
| Author |
Message |
Mr Webber
Community Member

Joined: 13 Apr 2008
Posts: 1824
Location: Terra Australis
|
| Posted: Thu Jan 28, 2010 7:53 pm Post subject: |
|
|
Wow, that is something very special, I had one lined up with Shawn but had to let it go, yours makes me want to rethink my priorities.
_________________
Formerly offworld66 |
|
| Back to top |
|
|
|
|
|
|
|
|
|
|
|
| Author |
Message |
superjedi
Community Member
Joined: 02 Apr 2007
Posts: 389
Location: Newport News, VA
|
| Posted: Sat Jan 30, 2010 4:57 pm Post subject: |
|
|
Thanks again. This really is a great kit and if anyone's really trying to build up a nice Alien collection, it's a nice piece!
OK, got the weathering done. It's all very subtle, so it doesn't really look much different. I began by airbrushing a "dusty" brownish shade in random areas. Nothing major, just to age it some.
Then I drybrushed (using a VERY dry brush) some silver over some edges to simulate some more wear. I didn't want to really overdo it, just add some character.
Here's a couple shots of the finished piece.

Now to find a good display case!
_________________
I find your lack of faith disturbing. . . |
|
| Back to top |
|
|
|
|
|
|
|
|
|
|
|
| Author |
Message |
superjedi
Community Member
Joined: 02 Apr 2007
Posts: 389
Location: Newport News, VA
|
| Posted: Sun May 09, 2010 3:17 pm Post subject: |
|
|
Quite a bump for this thread, but I got Shawn's excellent register mark decals a couple of weeks ago and finally had some time to apply them to my pistol.
These are printed on self adhesive vinyl and need to be trimmed down to fit the three small circles on the forward left portion of the gun body. I knew I wouldn't be able to cut them with scissors, so I went to Michael's and found a standard hole punch. It makes 1/4" holes, and this was the perfect size for these decals!
Once I punched them out, I wanted to distress them to match the weathered look of my pistol, so I cut chunks out of them with a small sharp pair of scissors. Finally, as Shawn recommended, I went around the edge of each one with a black Sharpie. Then I just stuck them on.
Here are a couple of shots.
So now my pistol is complete! Thanks, Shawn, for getting these done and in the mail. Just a small detail, but they add a great level of authenticity to the original prop.
_________________
I find your lack of faith disturbing. . . |
|
| Back to top |
|
|
|
|
|
|
|
|
|
|
|
| Author |
Message |
sethb6025
Community Member

Joined: 22 Dec 2006
Posts: 248
Location: York, PA US
|
| Posted: Sun May 09, 2010 6:31 pm Post subject: |
|
|
Nice! I didn't think of a hole punch! The register marks are the last detail I have to add to mine, think I may be able to finish it off now. Great work.
_________________
Wait; I'm having one of those things! You know; a headache with pictures? |
|
| Back to top |
|
|
|
|
|
|
|
|
|
|
|
| Author |
Message |
joberg
Community Member
Joined: 06 Oct 2008
Posts: 9471
|
| Posted: Mon May 10, 2010 6:35 am Post subject: |
|
|
| Most excellent! The piece is now complete |
|
| Back to top |
|
|
|
|
|
|
|
|
|
|
|
| Author |
Message |
Prefect42
Community Member
Joined: 06 Dec 2006
Posts: 34
|
| Posted: Thu Jun 10, 2010 4:20 pm Post subject: |
|
|
SuperJedi,
Loved your post so much I picked one of these awesome kits up from Shawn. It just arrived today and it really is a work of art right out of the packaging.
I've never used the liquid mask for weathering but am going to try that route. Your results are outstanding.
Thanks to SuperJedi and Morganthirteen. My wife hates you both now!
(I keed. I keed.)
Ted.
Prefect42.
_________________
Don't be cruel. There's no reason to be cruel. After all, nomatter where you go, there you are.
Buckaroo Banzai |
|
| Back to top |
|
|
|
|
|
|
|
|
|
|
|
| Author |
Message |
superjedi
Community Member
Joined: 02 Apr 2007
Posts: 389
Location: Newport News, VA
|
| Posted: Thu Jun 10, 2010 6:53 pm Post subject: |
|
|
Prefect, make sure to post pics once you get going! This really is a beautiful kit.
At some point (when I'm rich beyond the dreams of avarice ) I'd love to pick up one of Shawn's 'concept' Blade Runner blasters, too.
_________________
I find your lack of faith disturbing. . . |
|
| Back to top |
|
|
|
|
|
|
|
|
|
|
|
| Author |
Message |
superjedi
Community Member
Joined: 02 Apr 2007
Posts: 389
Location: Newport News, VA
|
| Posted: Mon Jul 05, 2010 5:58 pm Post subject: |
|
|
Hi all,
Didn't intend to bump this again, but I realized I hadn't posted the finished display for my pistol.
I prefer to case my props whenever possible. Helps keep dusting to a minimum. I went to Michael's and got a black shadowbox which was a nice size for this piece. I placed the pistol where I wanted to mount it and marked 2 places to drill through the backer board. I screwed in 2 machine screws I had in my spare hardware bin to support the piece. Then I put some double sided tape on a couple of patches I had ordered from the run here a while back and stuck them on the backer as well.
Simple and effective!
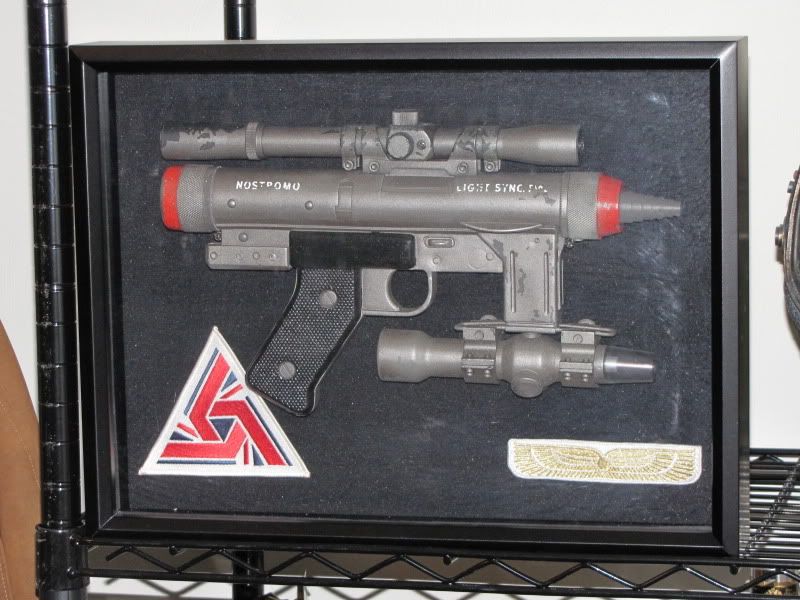
This pic reminds me I need to clean that glass!
_________________
I find your lack of faith disturbing. . . |
|
| Back to top |
|
|
|
|
|
|
|
|
|
|
|
| Author |
Message |
Gaff87
Community Member

Joined: 05 Oct 2008
Posts: 1727
Location: United Kingdom
|
| Posted: Tue Jul 06, 2010 5:56 am Post subject: |
|
|
Love the display!
The pistol looks stunning.
Neil |
|
| Back to top |
|
|
|
|
|
|
|
|
|
|
|
| Author |
Message |
joberg
Community Member
Joined: 06 Oct 2008
Posts: 9471
|
| Posted: Tue Jul 06, 2010 6:26 am Post subject: |
|
|
| Very nice display indeed! |
|
| Back to top |
|
|
|
|
|
|
|
|
|
|
|
|
You cannot post new topics in this forum
You cannot reply to topics in this forum
You cannot edit your posts in this forum
You cannot delete your posts in this forum
You cannot vote in polls in this forum
|
|
|
|
|
|
|
|