|
 |
|
 |
|
| Author |
Message |
Mark Sheppard
Community Member

Joined: 18 Apr 2009
Posts: 951
Location: In my office playing golf, pouring drinks, making deals.
|
 Posted: Sun Jun 21, 2009 2:35 pm Post subject: Posted: Sun Jun 21, 2009 2:35 pm Post subject: |
 |
|
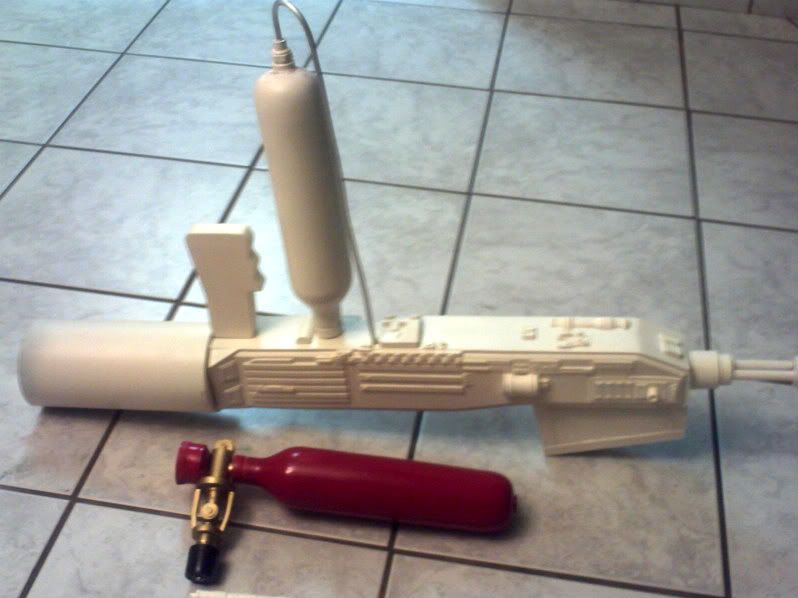
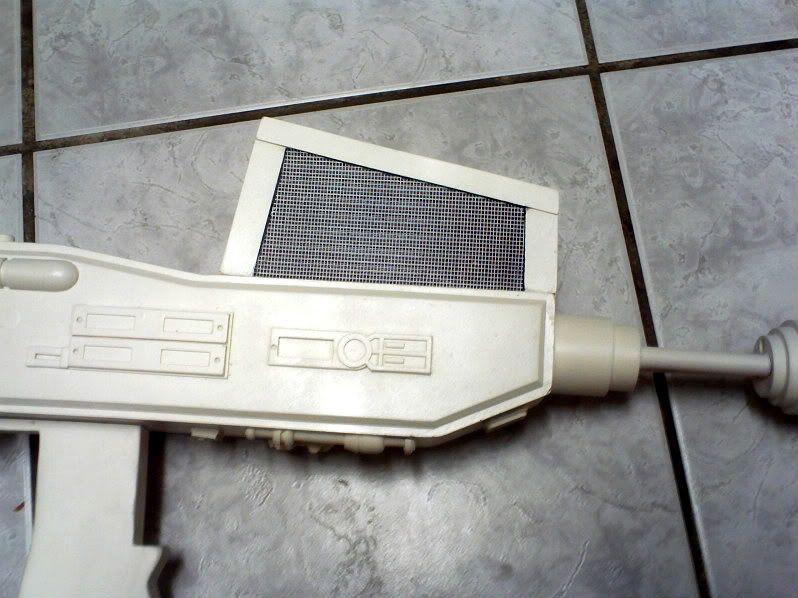
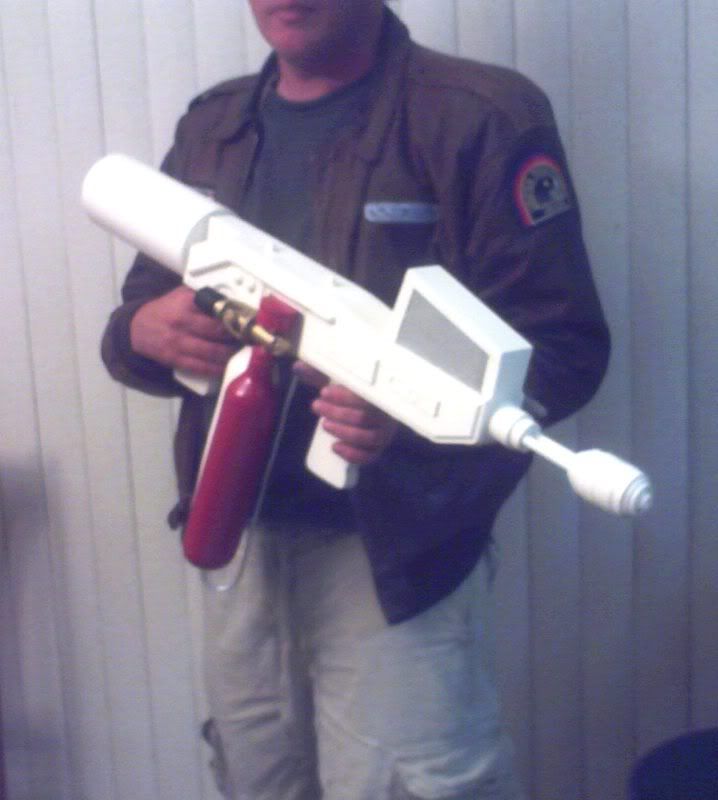
Here is a pic of progress I made last night with the spare time I had. Actually the detail on this is extremely close. only thing off a bit are the 2 knobs for the gas regulators, but I can always find new knobs.
the right prong on the side gets shortened and bent at a 90 degree angle using hot water, and then tubing feeds the emitter. I have a motorcycle spark plug that I will sink into the emitter, and a rubber plug wire for realism I will install.
 |
|
| Back to top |
|
|
|
|
 |
|
 |
|
|
|
|
| Author |
Message |
Gaff87
Community Member

Joined: 05 Oct 2008
Posts: 1727
Location: United Kingdom
|
| Posted: Sun Jun 21, 2009 4:49 pm Post subject: |
|
|
| Lookin' graet, JT! |
|
| Back to top |
|
|
|
|
|
|
|
|
|
|
|
| Author |
Message |
stephen210
Community Member
Joined: 07 Apr 2009
Posts: 196
|
| Posted: Sun Jun 21, 2009 7:47 pm Post subject: |
|
|
| That is looking AWESOME!! |
|
| Back to top |
|
|
|
|
|
|
|
|
|
|
|
| Author |
Message |
joberg
Community Member
.jpg)
Joined: 06 Oct 2008
Posts: 9447
|
| Posted: Mon Jun 22, 2009 6:34 am Post subject: |
|
|
| Good stuff JT! Take your time to find the closest parts for your flamer, it'll add to the realism of the piece. |
|
| Back to top |
|
|
|
|
|
|
|
|
|
|
|
| Author |
Message |
SKIN JOB 66
Community Member

Joined: 16 Jan 2008
Posts: 2724
Location: FRANCE
|
| Posted: Mon Jun 22, 2009 5:41 pm Post subject: |
|
|
Excellent work JT, I'm sure it'll look like the real thing in the end !
Fred
_________________
THE FUTURE IS A THING OF THE PAST |
|
| Back to top |
|
|
|
|
|
|
|
|
|
|
|
| Author |
Message |
Mr Webber
Community Member

Joined: 13 Apr 2008
Posts: 1824
Location: Terra Australis
|
| Posted: Tue Jun 23, 2009 1:58 am Post subject: |
|
|
Wow, I suddenly feel the urge to have one of these, a pulse rifle and a set of the pistols, lock and load, trucker style. 
_________________
Formerly offworld66 |
|
| Back to top |
|
|
|
|
|
|
|
|
|
|
|
| Author |
Message |
joberg
Community Member
Joined: 06 Oct 2008
Posts: 9447
|
| Posted: Tue Jun 23, 2009 6:41 am Post subject: |
|
|
Knowing you Tim, you'll probably make that flamer shoot real flames  |
|
| Back to top |
|
|
|
|
|
|
|
|
|
|
|
| Author |
Message |
Gaff87
Community Member
Joined: 05 Oct 2008
Posts: 1727
Location: United Kingdom
|
| Posted: Tue Jun 23, 2009 8:03 am Post subject: |
|
|
| joberg wrote: | | Knowing you Tim, you'll probably make that flamer shoot real flames |
Haha...too true. |
|
| Back to top |
|
|
|
|
|
|
|
|
|
|
|
| Author |
Message |
Mark Sheppard
Community Member
Joined: 18 Apr 2009
Posts: 951
Location: In my office playing golf, pouring drinks, making deals.
|
| Posted: Fri Jul 03, 2009 2:17 am Post subject: |
|
|
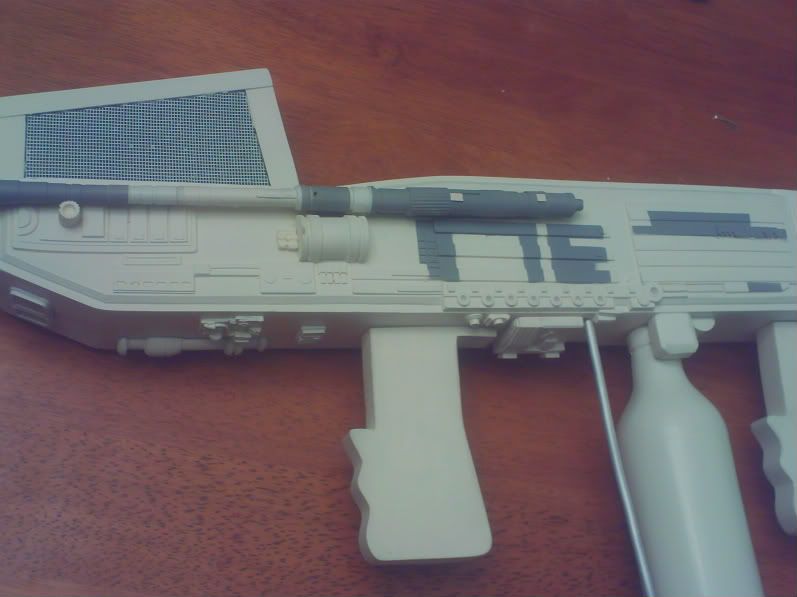
Here is a partially completed incinerator being glued together with epoxy and super glue. Use a dremel tool to cut off the molded "triggers" from the handles, and simply sand the cut areas of the handles by sliding them across a piece of 200 grit sandpaper set on a board. You can use the edge of a workbench or counter.
I am going to use 2 bare metal triggers from a pair of cheap caulking guns to make the triggers look just like the real thing.
after a lightly sanding the handles with 250 grit and then 400 grit sandpaper, I draw a center line right from the butt-stock to the white oxidizer bottle, drill a straight hole in both the handle grip and the incinerator body using a small pilot drill bit, then a 1/4" drill bit.
.. fill the holes about half way with epoxy, and then place the dowel into the handle, and then install the handle grips onto the incinerator body....
Use 1/4 inch furniture dowels for these large parts!
Use the provided aluminum gas line in the same way... fill the holes about halfway with epoxy..and then install the gas line from the red fuel bottle to the bottom of the incinerator as shown...
 |
|
| Back to top |
|
|
|
|
|
|
|
|
|
|
|
| Author |
Message |
Gaff87
Community Member
Joined: 05 Oct 2008
Posts: 1727
Location: United Kingdom
|
| Posted: Fri Jul 03, 2009 6:05 am Post subject: |
|
|
Coming along really nicely, JT.
Love it!! |
|
| Back to top |
|
|
|
|
|
|
|
|
|
|
|
| Author |
Message |
joberg
Community Member
Joined: 06 Oct 2008
Posts: 9447
|
| Posted: Fri Jul 03, 2009 7:07 am Post subject: |
|
|
| Keep up the good work JTP! It's coming along just fine |
|
| Back to top |
|
|
|
|
|
|
|
|
|
|
|
| Author |
Message |
Space Jockey
Community Member

Joined: 13 Apr 2009
Posts: 559
Location: East Tennessee
|
| Posted: Fri Jul 03, 2009 12:43 pm Post subject: |
|
|
| Yeah, that is looking really good. Looking forward to seeing it painted. |
|
| Back to top |
|
|
|
|
|
|
|
|
|
|
|
| Author |
Message |
Mark Sheppard
Community Member
Joined: 18 Apr 2009
Posts: 951
Location: In my office playing golf, pouring drinks, making deals.
|
| Posted: Fri Jul 03, 2009 11:34 pm Post subject: |
|
|
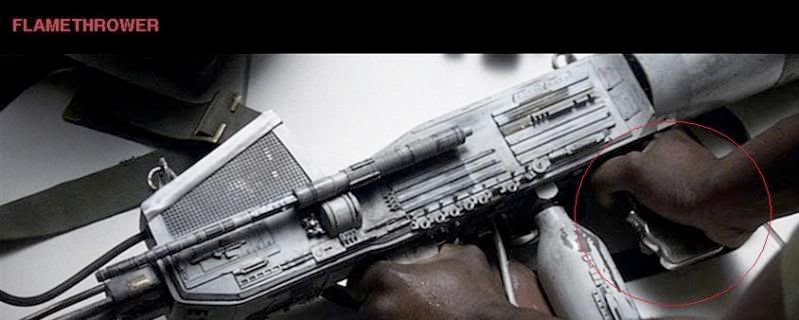
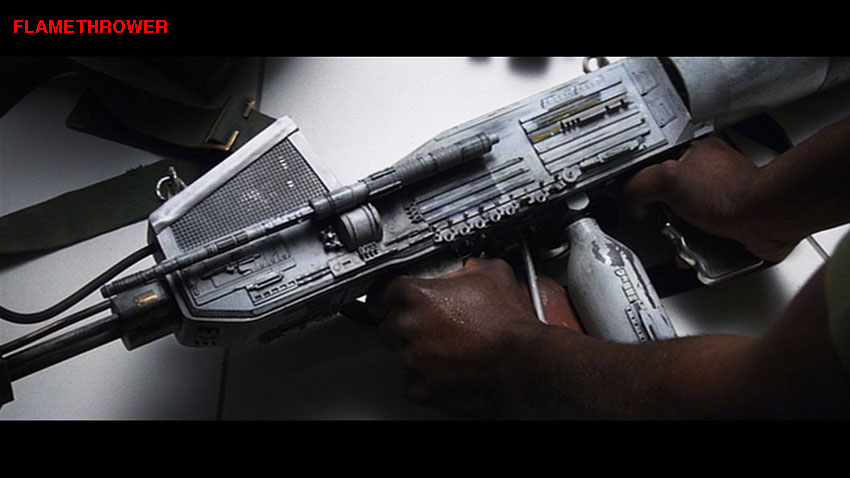
..Check out the silver metal grips on Dallas's Incinerator... way different from the prop store of London.. I am doing mine like this...
that is rad!
 |
|
| Back to top |
|
|
|
|
|
|
|
|
|
|
|
| Author |
Message |
Mark Sheppard
Community Member
Joined: 18 Apr 2009
Posts: 951
Location: In my office playing golf, pouring drinks, making deals.
|
| Posted: Sat Jul 04, 2009 1:37 am Post subject: |
|
|
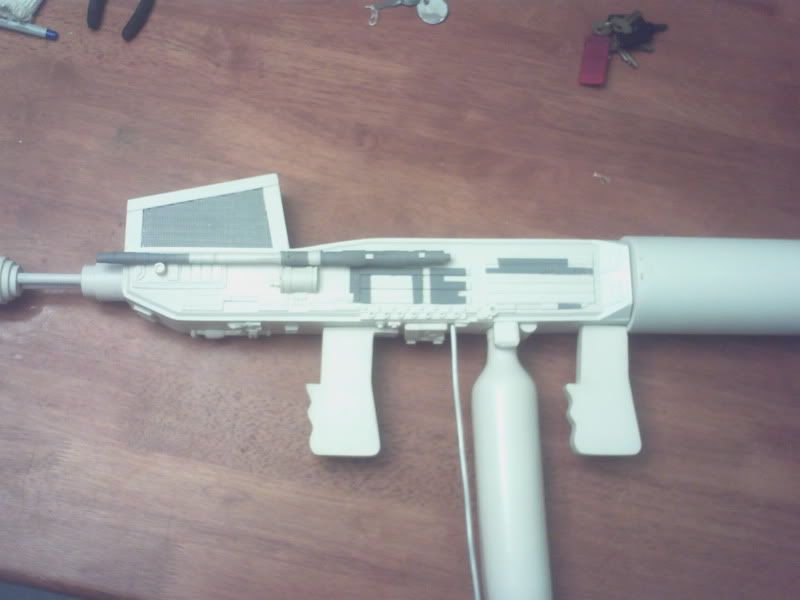
Here is a quick set of photos I threw together of the incinerators' cooler assembly:
first, mask off the area with newspaper and cheap masking tape..
spray the area with flat or wrought iron black paint....
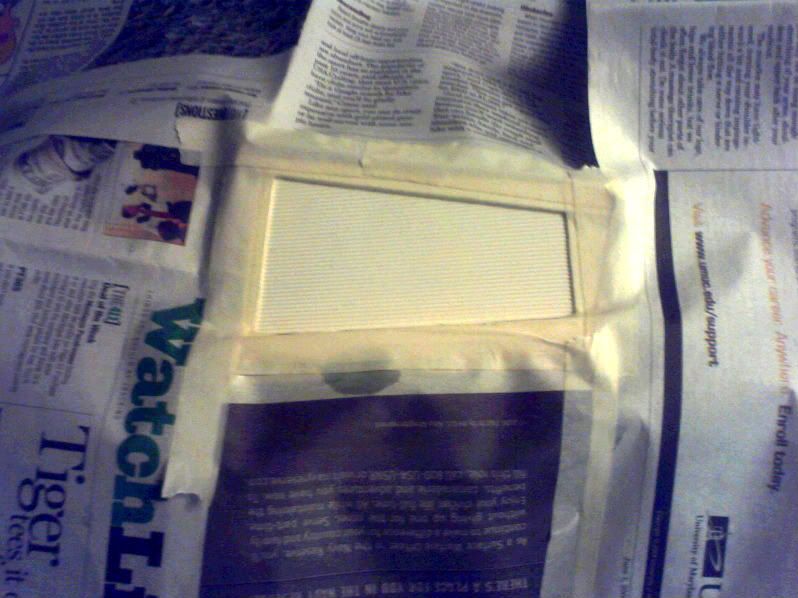
Next paint both sides of the included screen mesh material with spray paint. On the entire model, I am using FUSION dove white. It is actually a very light gray in color. hang up the mesh parts on a thumbtack or small nail to dry for 15 minutes...
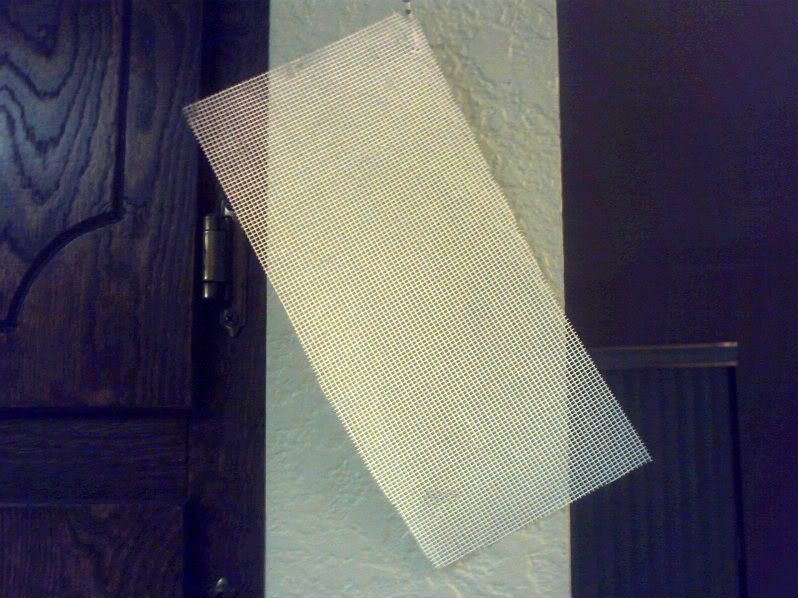
after the mesh parts are almost dry, lay them over the cooler grill and use a sharp lead pencil to very lightly trace out the shape around the edges, then with a pair of scissors cut oyt the shape...lay it into the back painted part (it will most likely adhere) and use a few small drops of super glue on each corner to make it permanent.
 |
|
| Back to top |
|
|
|
|
|
|
|
|
|
|
|
| Author |
Message |
joberg
Community Member
Joined: 06 Oct 2008
Posts: 9447
|
| Posted: Sat Jul 04, 2009 8:14 am Post subject: |
|
|
| Model-making 101...love it JTP |
|
| Back to top |
|
|
|
|
|
|
|
|
|
|
|
| Author |
Message |
Mark Sheppard
Community Member
Joined: 18 Apr 2009
Posts: 951
Location: In my office playing golf, pouring drinks, making deals.
|
| Posted: Sat Jul 04, 2009 10:07 pm Post subject: |
|
|
In this pic I am starting the painting before "dirtying down"
The main color is KRYLON FUSION "dove white"..actually a very light gray. and gray for the details seen in the movie...
Here is Freds screencap and my model.. You can tell
Shawn and Cristofer put a lot of work on the details..pretty damn close..
 |
|
| Back to top |
|
|
|
|
|
|
|
|
|
|
|
| Author |
Message |
joberg
Community Member
Joined: 06 Oct 2008
Posts: 9447
|
| Posted: Sun Jul 05, 2009 7:32 am Post subject: |
|
|
| Lookin' good so far...I noticed some greeblies on the side of the "bottle"; are you going to add those as well? |
|
| Back to top |
|
|
|
|
|
|
|
|
|
|
|
| Author |
Message |
Mark Sheppard
Community Member
Joined: 18 Apr 2009
Posts: 951
Location: In my office playing golf, pouring drinks, making deals.
|
| Posted: Sun Jul 05, 2009 11:05 am Post subject: |
|
|
| joberg wrote: | | Lookin' good so far...I noticed some greeblies on the side of the "bottle"; are you going to add those as well? |
yeah I saw those..they are on this one parker has, but Im not sure about Ripleys. I will probably add them...they look like a couple rows of squares on a strip and some cast part. One things for sure...The one on Freds pics here is much more detailed and complex the the propstore of London version.. |
|
| Back to top |
|
|
|
|
|
|
|
|
|
|
|
| Author |
Message |
stephen210
Community Member
Joined: 07 Apr 2009
Posts: 196
|
| Posted: Sun Jul 05, 2009 10:57 pm Post subject: |
|
|
| Outstanding job!! |
|
| Back to top |
|
|
|
|
|
|
|
|
|
|
|
| Author |
Message |
Mark Sheppard
Community Member
Joined: 18 Apr 2009
Posts: 951
Location: In my office playing golf, pouring drinks, making deals.
|
| Posted: Sun Jul 05, 2009 11:20 pm Post subject: |
|
|
Thanks Steve!
even though I have still a ways to go, its starting to take shape.. It even feels like the real thing! I was out on our street yesterday on july fouth with it before sundown showing a neighbor, and people driving by were doing double-takes and pointing LOL! my right to "firearms"...
 |
|
| Back to top |
|
|
|
|
|
|
|
|
|
|
|
|
You cannot post new topics in this forum
You cannot reply to topics in this forum
You cannot edit your posts in this forum
You cannot delete your posts in this forum
You cannot vote in polls in this forum
|
|
|
|
|
|
|
|